Mercedes 2626 AK 6x6

Moderator: Moderatoren

Nachricht
Autor
Benutzeravatar
pairospam
süchtig
Beiträge: 883
Registriert: 2010-11-22 14:27:25

#61 Beitrag von pairospam » 2011-06-01 1:55:48

The Dakar had ended only a few days before and both brothers still had nightmares full of dust and rocks, and still gear and stuff came out from the box of the truck. We agreed also that I would take initially six of their GoodYear 14.00R20 wheels to stand up the Merkabah and then I would pick two more as spares. For the rally they imported a full container of such wheels and they were selling at a very convenient price those they did not use.
Francisco Casale fabricated and adapted a very interesting system to inflate/deflate the wheels while driving but it was a little prominent and he struck it against a highway toll. Interesting as well was his pivoting system between the box and the chassis: simple, practical and robust, and it stood both Dakar!
Back at the workshop the crankshaft made me a little nervous because the idea of buying a new one was not funny at all; Spare’s crankshaft was useless. With the appropriate torque the rods got loosen and the shaft rolled unstoppable towards me with its almost 80 kilograms. After an extensive inspection the colours returned to my face: it seemed to be O.K. Only one crankpin needed a little polishing but the rest was in good condition and it could remain in 0,25. We inspected the sleeves and they also required polishing, but only that. The rings would be upgraded to 0,25 too.

Bild
Bild
Bild
Bild
Bild
Bild
Bild
Bild
Bild
Bild

Benutzeravatar
pairospam
süchtig
Beiträge: 883
Registriert: 2010-11-22 14:27:25

#62 Beitrag von pairospam » 2011-06-01 5:21:17

When dismantling Spare’s engine I was intrigued by how bad the cam followers looked and how comparatively well looked the camshaft. When I finally took off the camshaft, the cam followers begun to fall and to my surprise and horror they looked even worse, like chewed by some kind of metal-eating termites.
The camshaft itself presented some variable wear and tear from cam to cam. Not convinced at all, but as there was many money at play, I thought that it was not too much to worry. Eduardo did not even looked at me in the eyes. Bad sign.
A closer look at the camshaft bearings showed that time and kilometers had made havocs on them. Maybe cheap oil might have contributed to the dramatic damage. At least we knew the cause of the ralenti low pressure; could be worse, though.
Looking at both camshafts it was unavoidable to think as a self-financed restorer: “How cannot at least one of these fu....ng things be still useful?”.
After many interrupted hours of work the block was completely naked. It would remain there, complaining and leaning on one side, until we could take it to Santiago to take off the camshaft bearings and replace them with new ones.
In the meantime I insisted stubbornly with the footstep, trying to remove any sign of rust and old paint from it and to flatten out the metal sheet. Even with the new instruments the results were less satisfying than expected, but given the circumstances the job was judged good enough.

Bild
Bild
Bild
Bild
Bild
Bild
Bild
Bild
Bild
Bild

Benutzeravatar
pairospam
süchtig
Beiträge: 883
Registriert: 2010-11-22 14:27:25

#63 Beitrag von pairospam » 2011-06-01 5:35:36

I worked further refining the design of the Box and you can see on the sketch the external details of the profiles and unions between the pannels that should be made from polymeric material, ideally epoxic resin reinforced with fiber glass 3mm thick. Well, there are no such profiles in Chile and I would have to fabricate them or import them from Europe. Here you can find some alluminum profiles but I do not actually like them or they are not appropriate for the design of the Merkabah at all.
For the base of the Box I decided to build a frame included in the floor. There will be two classical parallel square section beams following the truck’s frame parallel side members, and crosspieces of C section made of steel of two different thickness to save weight and to bring enough resistance. Other designs use less crosspieces but always thicker than those of mine. If there is no single way to do it, then the best way is my way! Under and over the steel frame there will be plywood and, between these, several pieces of medium density blocks of expanded polystyrene. The underside will be covered by a 2 mm. thick film of glass fibre.
A very big decision had been postponed until that moment: the colour of the Merkabah. We made a flash trip to the paint-shop to take many samples and drank many cups of tea while discussing the issue. Carmen and I have very similar tastes so the decision was, of course, all hers. The Merkabah would travel the whole world dressed in SY-5263-P.


Bild
Bild
Bild
Bild
Bild
Bild
Bild
Bild
Bild

Benutzeravatar
pairospam
süchtig
Beiträge: 883
Registriert: 2010-11-22 14:27:25

#64 Beitrag von pairospam » 2011-06-01 5:49:56

On february 11th Eduardo and I took the block and both old camshafts to a very reputed machine-shop in Santiago. Some local opinions were prone to put the best of the camshafts back to work but neither Eduardo nor me were pretty convinced. At the shop the technician shot one single glance at both pieces of steel and sentenced their death. After watching my face he then took them on the test bank, took his book and made some measurements and corroborated his initial judgement. To attenuate the suffering he gifted us with a tour to the shop and showed us blocks from engines that made the old OM402 look like a pygmy. The machinery was huge and it oddly functioned in a very precise and silent order.
With nothing else to discuss we went through the hellish traffic of the afternoon in Santiago and bought the new bearings and the original camshaft from a known dealer at a fraction of the price from the official Mercedes dealer. Urged by the rushing hour and the car rows that were beggining to form on the streets and highways we left the new camshaft at the shop and made a stop by Casale’s to pick up the rims and the wheels bought some days before. Due to de mass of the wheels and the seven rims we took only four wheels and, almost wheeling, headed back to San Felipe.
The wheels were taken directly to the cattle and the rims remained at the workshop for the polishing and painting process. Some people saw us at the arrival and days after I heard about rumours that Pairoa now was on the business of selling tractor wheels around. Little town, hell of a town.
The day after I run to the cattle and put the wheels aside the truck to see how they looked. The difference between the “gigantic” wheels on the alluminum rims and the new wheels was notorious. The rush lasted only a few minutes and the wheels were put inside a little shed to prevent them to be stollen. By who? may you think...but there is always a sonovabitch around.

Bild
Bild
Bild
Bild
Bild
Bild
Bild
Bild
Bild
Bild

Benutzeravatar
MB2031
süchtig
Beiträge: 870
Registriert: 2009-01-07 17:04:53
Wohnort: (Frankreich) wo unser LKW steht

#65 Beitrag von MB2031 » 2011-06-01 6:46:15

:eek: :eek: :eek: :eek: :eek: :eek: :eek: :eek:

SPRACHLOS

:eek: :eek: :eek: :eek: :eek: :eek: :eek: :eek:
Das Leben in ORANGE sehen .................

Wer bis zum Hals in Scheisse steckt, sollte den Kopf nicht hängen lassen.

Benutzeravatar
Wombi
Trucker-Urgestein
Beiträge: 8653
Registriert: 2006-10-03 19:57:10
Wohnort: südl. München /// zZ. wieder Uruguay
Kontaktdaten:

#66 Beitrag von Wombi » 2011-06-01 9:00:45

Ich schraub ja gerne, aber da würde mich der Mut verlassen ..... :ohmy: :eek: :(

Und günstig wird sowas sicher auch nicht.

Gruß, Wombi
Es ist an der Zeit, die Reste der Welt zu entdecken........

15.4.2013, ab da werden wir uns für seeeehr lange Zeit nicht mehr sehen :-))))

Der Urlaub ohne Stress hat begonnen :-))) www.wombi-on-tour.de

Benutzeravatar
pairospam
süchtig
Beiträge: 883
Registriert: 2010-11-22 14:27:25

#67 Beitrag von pairospam » 2011-06-01 17:43:20

Hi, again:

Wombi: traslation is quiet bad but I think I understand what you may have said, and you are right, partially. I am doing practically all the job so the cost of all this project is a fraction of what it could be if you "buy" it. It is not cheap, of course, buy I really like the fun of it.

MB2031: many people open wide their eyes looking at the whole thing, but I am not always quiet sure if they are thinking "What an effort!" or "What a crazy guy!". Thanks anyway.

I go on a little further.

Painting time was arriving at that point so I got a conical brush for the sander and left the famous footstep shining; I repared and re-welded it and as I was finishing I applied three hands of epoxic primer. The learning curve was very steep and drips were not seen at all.The final result was not bad at all given the initial condition. Another specialty that I was entering in with growing success.
Were the cylinder heads in the oblivion? Not at all. We were just waiting for someone with more experience with such engines to tell us if the valves were O.K. or they needed replacement. I took apart the 32 rocker arm mechanisms, naturally, and the older and expert mechanician told us that they were in very good condition, they just needed some cleaning and adjusting. I remember beeing suddenly affraid by what these words could mean.
The rims were the next thing to go about after ordering the paint and buying the primer and the painting pistol. I tried firstly to clean the rims myself with the new brush but it was very hard and frustrating. I desisted and took the rusty and heavy things to a sanding place next to San Felipe. The only place near San Felipe. Another old spanish man and another: “Don’t you worry! They will be ready for Friday!”. Everytime someone says “don’t you worry!” I feel the urgence to run to save myself from something terrible, but I left the rims there anyway and took his promise of delivery. Obviously when I went to pick the rims they were not sandedbecausethecompressorbrokeandthereisnospareandatSantiagotheychargetoomuchwewilltrytofixitandeverythingiso.k.anddon’tyouworry and Olé!
I left the rims and went for them the next week. The job was done but some paint still remained stuck to the steel. I took just a couple of them and left the others rims for the man to complete the job as I needed and asked for. You can see the remainings of paint and rust on the pictures and I considered them unacceptable. The old man considered that he had done a good job and did not like the idea to do it again.

Bild
Bild
Bild
Bild
Bild
Bild
Bild
Bild
Bild
Bild

Benutzeravatar
pairospam
süchtig
Beiträge: 883
Registriert: 2010-11-22 14:27:25

#68 Beitrag von pairospam » 2011-06-01 18:42:34

Waiting for the rims to be ready, Eduardo and I went to Santiago again to pick up the block that was supposedly ready, with its new flat bearings for the camshaft in the right position and professionaly and perfectly adjusted to the new shaft. As they told us “Don’t you worry! when we left the block the previous week, we followed our instinct and callled them before arrival and, guess what..yes, it was not ready. They actually had not yet even started to work on the block. Bad. Shifting destiny we got, hardly in the classical rush midafternoon hour, to the dealer where we bought the pressure plate, the rings, the most complete gasket joints set available, all the flat bearings and the repair kit for the air compressor. We also ordered the flywheel that was not in stock. We made again a stop at Casale`s and picked the two remaining wheels and the thoric joints necessary to mount the tubeless wheels on the rims.
The next day I went, again, to the sanding shop with a growing apprehension feeling. I found the old man and he did not even looked at me when he said :“Well...I haven’t not yet begun with your rims”. It took me some very long seconds to calm down and then I picked myself the rims, put them on the Mitsubishi’s pickup and I left, very slowly, without saying a word. You cannot change some things, not even if you strangle someone to death.
Back at the workshop I realized that the past night rain had caused the sanded and exposed steel to rust in many places. Life is hard sometimes.
I needed a few hours with the steel brush to re-polish the metal and get the rims ready for the priming. Mi past experience with painting was only adressed to the footstep, and to the painting of the 1/72 scale airplanes of my youth.
Well, nothing seems to be easy, neither was with the painting issue, specially for the scarse available space to do the job at the workshop. It was just enough to move around, you can see how difficult it was to paint the 21 pieces. I covered the surroundings and the floor with some tissue and stardted to spray primer everywhere. It came a very funny but demanding task to prime every corner of every piece. The little air compressor, abused and at the end of its days, accompanied me but with reluctance, and needed to rest from time to time. As I proceeded I became more and more confident and I demanded more from it. As I needed to apply at least two hands and let the primer dry for at least 24 hours, and every time turn around and accomodate every piece in such a little space, it was a very complicated and slow process. Only for priming I spent three days. Of course, before finishing the first hand I changed and began to use a professional mask.

Bild
Bild
Bild
Bild
Bild
Bild
Bild
Bild
Bild
Bild
Bild

Benutzeravatar
pairospam
süchtig
Beiträge: 883
Registriert: 2010-11-22 14:27:25

#69 Beitrag von pairospam » 2011-06-08 3:48:54

Once the priming was ready I started with the definitive paint, but at the beggining of the first rim the poor but faithful compressor coughed, made some strange noise and stop running, forever. It was an annouced death but, as always, the problem happened at the last hour of the day, with a full charge of an expensive catalyzed polyurethane paint prepared and ready to be used or lost. I then ran to the shop and got in just before the doors closed; I picked the biggest compressor in stock and kicked it to the cashier. At the moment I lifted the box for her to pass the laser reader the box opened and the compressor and its accesories almost fell to the ground. Bad sign, I felt it. The guards opened the doors for me to leave the place.
Back at the workshop I took the manual and read it carefully. I never, never have done that before but I had a bad feeling. I plugged the compressor and the motor started at once. After three minutes the tank was empty and some odd smoke began to come out from the regulator case. Horror. And the paint was waiting, and it was late.
Then, after some calls and trips, Eduardo showed up with a bigger compressor, borrowed from another friend. Good friends, as Joe pointed out before, are the key.
To make the story short, I resumed painting at eleven o’clock in the afternoon and finished (first hand, one side only) at two in the morning. On the pictures the paint came a little pinkish, but actually it is lighter than that, you will see.
The next day I went back to the store with the broken compressor. There were no problems and they gave me my money back at once. I took it and went to a known gas and equipment distributor and bought the biggest compressor in stock, again. We bought it together with Eduardo as it will stay on the workshop after finishing the project.
As to continue with the fatal allure of this episode, at the moment of plugging and starting the new machine it was evident that the head of the cylinder leaked. We phoned the seller and he arrived a couple of hours later with another compressor, the one in the display counter, to check if it was a minor issue or something bigger. Unfortunately, the compressor that he took coughed twice and it stopped one minute after starting, dead. Dead for real. These Chinese people and their machines!
After a hundred calls to the main office it was decided that we were going to keep our compressor and tighten a little the head cylinder bolts and check for further leaking after a couple of hour of use, or our money would be back again in our pockets. Anyway.
Then and finally I spent three more days (afternoons, actually) to finish the paint job. There were only a couple of drips in the 21 pieces and they were on the occult side of the rims, so I considered it an extraordinary achievement for this amateur with big pretensions.
I wanted not to think about paint and wheels for a while so I worked a couple of days exclusively on the design of the Merkabah, every time more complete. The union between the Box and the chassis of the truck would be not original and pretty much similar to many other 4 point pivoting systems to allow torsional forces of the frame without harming the Box itself. Nothing new, but it had to be designed and fabricated precisely. The dimensions and shape of the pivots were different from each other in order to avoid conflicts with the gear bulging out the chassis. You can also see on the sketches the relationship between the pivots and the inner frame of the base of the Box.


Bild
Bild
Bild
Bild
Bild
Bild
Bild
Bild
Bild
Bild

Benutzeravatar
pairospam
süchtig
Beiträge: 883
Registriert: 2010-11-22 14:27:25

#70 Beitrag von pairospam » 2011-06-08 4:02:40

On February 23rd, after drying for three days, the recently painted rims were ready. I got three wheels from the cattle and took them and the rims to the usual shop. I practically mounted them myself because I was hysterical, terrified with the idea of the operators bruising or ruining the paint. But it was impossible to avoid some staining and grease. The mounting process was quiet simple but until the first wheel was mounted and ready they took it very calmly, amused by how wide open my eyes went when they put their dirty hands over the immaculate rims. The wheel-grabber (no idea of its actual name) also left its imprinting on the paint, but the men really made their best effort. The girl at the counter watched and compared the wheels and wanted to charge me as if they were tractor wheels, but as I was not in the mood she thought it twice and charged me as normal truck wheels. Once the three wheels were ready I took them back to the workshop. The next day the operation was repeated but the process was far more expeditious and after finishing I could not avoid myself to "fly" to the cattle to install them on the truck. At the moment I put the first wheel the whole thing changed substantially, and for the first time the Merkabah got its “all-terrain” allure, envisioned in a casual walk so many months before.

Bild
Bild
Bild
Bild
Bild
Bild
Bild
Bild

Benutzeravatar
pairospam
süchtig
Beiträge: 883
Registriert: 2010-11-22 14:27:25

#71 Beitrag von pairospam » 2011-06-08 4:22:33

One by one the wheels went at their place and after a couple of hours of solitary and well known work the truck was finally itself. It was no longer the tortured and exhausted tipper at the edge of the wreaker’s yard, no sir… it was a very sophisticated and elegant instrument for the knowledge of distant and different places and cultures. Well, there was a lot still to go…but I am sure that you understand the concept.
The distance between the wheels of the tandem shortened quit a bit but nothing to worry about; the space between the wheels and the frame was wide enough to put the bellows of the air suspension system and for a couple of batteries too. Good.
Definitely the look of the Merkabah was extraordinary to my eyes, and the color picked was the right one.


Bild
Bild
Bild
Bild
Bild
Bild
Bild
Bild
Bild
Bild

Benutzeravatar
pairospam
süchtig
Beiträge: 883
Registriert: 2010-11-22 14:27:25

#72 Beitrag von pairospam » 2011-06-08 4:44:29

I borrowed from someone with more time and skills the models for allrad looking wheels and put them on the virtual Merkabah. I also completed (almost) the roof rack where the spare wheel(s) would go. The rack needed to be 252 cm. wide if I wanted to put both spares; it would also be unitary with the external tubing to protect the windshield from the branches. In the last trip that Carmen and I made before dismantling the engine there was no pine or eucalyptus branch that did not smashed violently against the windshield on the straight countryside roads.
Some fog lights completed the scene, even if I do not like very much round lamps.
The front winch was installed with a frame protection that will supposedly tilt to allow the cabin to tilt at its time. I was not sure, though, about the legal viability of the arrangement.
I put a tubular protection on every edge of the Box exposed to potential strikes and hittings. The interior of the Box was minimally rearranged and three 1,5 m2 photovoltaic panels were added on the roof just in front of the main bedroom, just in case I wanted to make a sunroof to romantically watch the stars in a near future.
In a rear lateral view you can see the motorcycle/spare rack and also the rear tilting bumper in its offroad position. I have chosen a 45º escaping angle to make sure that I will not brake anything anywhere in some very rough and distant terrain but certainly it was not strictly necessary.
I also was very careful and detailed with the design of the service boxes, emphasizing the fact that it would be me to build them. The bigger box on the left side would be for the batteries and the second for the diesel generator, as previously said. The ones in front and above the wheels will contain the grey and black water with at least 75 liters of capacity each. The rear boxes will contain spares, gear, and tools.
Under the frame at the rear there will be a second powerful winch of unknown nature yet, hiding between the boxes to avoid interfering with the escaping angle.
If we take off the rear wheels (gracefully with a click, thanks God!) it can be appreciated the location of the air suspension bellows over the brackets of the leaf- spring pack; well… if you do not see the leaf-spring pack and the axles they must be somewhere.
If we take off the front wheels you can see the arrangement of the double shock absorbers and their relations with the bellows of the air suspension. Here I worked a little more and put something like an axle.
Maybe I need to explain at this point that the air suspension to be installed on the Merkabah will be a support system and that the original leaf-spring packs will certainly be modified but will remain the primary suspension system of the truck. Air suspension will be manually managed from the cabin and help with the hardness and the highness of the suspension and also with the horizontal stabilization of the Merkabah at the time to sleep and bivouac. That is the reason for the size and location of the air bellows on the design as shown on the sketch; I also hope that the location itself will help to prevent the bellows to be easily damaged.
Any comments and experiences on the subject will be much appreciated.


Bild
Bild
Bild
Bild
Bild
Bild
Bild
Bild
Bild
Bild
Bild

Benutzeravatar
Joe
abgefahren
Beiträge: 2198
Registriert: 2006-10-03 10:37:46
Wohnort: 55597 Wöllstein
Kontaktdaten:

#73 Beitrag von Joe » 2011-06-08 8:36:11

Hi,

great progress! Congrats! :cool:
You will experience a problem if you want to put on chains, the distance between the rear tires seems to be now too small.
Mit lieben Grüßen von der Nahe
Joe

Die "private" Seite ist unter www.gertenbach.mobi zu finden.

Veho Ergo Sum // Feinstaub ist doch Kinderkram - Grobstaub!!

Benutzeravatar
all(r)addin
Schlammschipper
Beiträge: 450
Registriert: 2006-10-03 13:04:40
Wohnort: 8905

#74 Beitrag von all(r)addin » 2011-06-08 9:45:02

Wow!..what an incredible project! I wish you a lot of energy (and money.. :D )

BTW: I'm not so sure if it's really clever to put 2 spare wheels on top of the cabin..that must be something like 300 or more kg that you're planning to put up there..which is in my opinion much too much and also not really ideal as this rises the balance point of the truck ...you might ask Piry (from here in this forum) if it's generally ok to put that much weight up there regarding to the technical guidance of Mercedes...

..good luck for your project!

Cheers: Alain
....Gott gebe dass es klebe!
...einmal dachte ich, ich hätte Unrecht...aber ich hatte mich getäuscht!

Benutzeravatar
Joe
abgefahren
Beiträge: 2198
Registriert: 2006-10-03 10:37:46
Wohnort: 55597 Wöllstein
Kontaktdaten:

#75 Beitrag von Joe » 2011-06-08 10:13:55

Hi Alain,

I already raised the same concerns when I read about the project in his "homeland"-forum - he already changed his ideas but is still using the old pics.
Mit lieben Grüßen von der Nahe
Joe

Die "private" Seite ist unter www.gertenbach.mobi zu finden.

Veho Ergo Sum // Feinstaub ist doch Kinderkram - Grobstaub!!

ifaw50
neues Mitglied
Beiträge: 26
Registriert: 2007-03-11 10:43:01

#76 Beitrag von ifaw50 » 2011-06-08 10:36:03

big up big up!
Are the spareparts cheaper than here in GOG?
You are from america de sud?

Benutzeravatar
pairospam
süchtig
Beiträge: 883
Registriert: 2010-11-22 14:27:25

#77 Beitrag von pairospam » 2011-06-08 17:07:37

Hi Joe: Theoretically the chains can run without hitting each other but certainly it will be hard to put them on. Life is hard.

Alain: It is not clever at all to put both spare wheels on top of the cabin, I already said that, it is crazy but it looks good as the screen (and paper) stands for anything. As Joe says it was only an idea, and actually it permitted me to delay adressing the problem that I want to have two spare wheels and the motorcycle at all times.
Thanks for your comments.

ifaw50: Excuse me but I will assume that GOG means Germany, and no, not at all: spareparts are quiet expensive here comparing the prices in the internet. Original spares from the official dealers are, obviously, the most expensive.
Chile is a pretty odd and beautiful country and yes, it is in South America. We are in the news again because one of our southern volcanos, the Puyehue, erupted a few days ago. I was at its feet in march.

I kindly invite you all to Google and Google Earth for my country.


Cheers.

Benutzeravatar
pairospam
süchtig
Beiträge: 883
Registriert: 2010-11-22 14:27:25

#78 Beitrag von pairospam » 2011-06-08 18:54:48

I considered also to put appropriate defenses for both the engine and the transfer box, the lowest point of the truck.
If we take off some of the walls you can see grosso modo how things are arranged in the Box. Under the seats of the dining-living room there will be space for the fresh water tanks and the pumps and filters system. In front of the sink there will be space for storage and for the oven. The shower will go separated from and in front of the bathroom and the refrigerator, not shown on the sketch. Under the bed there will go the washing machine, the gas (propane/butane) tanks and I do not know still how much gear and stuff, but it will certainly be not enough space.
Oh, about the block! The guys from the machinery shop gave us a thousand excuses, but as they did not warned us and we finally “lost” the trip they took the block to San Felipe and left it at the workshop the next morning. They delivered, at the end. The heavy piece of steel, chemically washed and carefully wrapped, would have to wait until the end of the holydays before the beginning of the reassembling.
Without even watching it Eduardo asked me to buy a new oil pump, and I did so. Many kilometers went over, many kilometers to go through; better safe than sorry. The pump arrived the next morning after ordering and it also was left aside, waiting for the reassembling period to begin.
Before departing for the holydays I made a last visit to the Merkabah at the cattle. The truth is that there it stood still, but it was comforting to give it a look after so long, being worried by minutiae. Plants had grown under the truck.
Checking the growing oil leak from the cube of the third axle I realized with horror that the mud guards were in line with the front wheels path. The free distance between the wheel and the steel was not so straight but the truck was without engine and without any load. When the truck would be loaded there may be a conflict in rough terrain, even if I have seen other NG class with 14.00R20 with big mud guards. The solution might be moving out the mud guards by 8 cm., or directly cut them. The former seems still viable to me, but it is necessary to drill holes and cut anyway. The second I do not like because if you cut the mud guard you take the bent edge off and this weakens the whole piece. Some of these trucks come with short ad hoc mud guards from the assembling plant, like the military one on the picture that I liked so much (actually I was looking for this model with longer wheel base in the first place). The alternative pieces are not available in Chile. Any experience?
One of the aspects mostly appreciated after the wheel change was the increase of the distance from the axle to the soil; even if it was only of a few centimetres it looked spectacular. You can see the brackets of the spring-leaf packs that should be modified to allow the frontal sway bar to be bolted, using some parts from Spare with a little welding, of course.

Bild
Bild
Bild
Bild
Bild
Bild
Bild
Bild
Bild
Bild
Zuletzt geändert von pairospam am 2011-06-14 21:59:50, insgesamt 1-mal geändert.

busbart
neues Mitglied
Beiträge: 7
Registriert: 2011-06-10 18:14:13
Wohnort: frankreich

#79 Beitrag von busbart » 2011-06-10 18:22:01

:eek: great job! . specially since you probably do not have the same acces to parts as we have here in europe?!!!!
continue!!!
gruss, Bart

Benutzeravatar
el Capitán
Überholer
Beiträge: 255
Registriert: 2009-07-03 17:27:36
Wohnort: Bremen
Kontaktdaten:

#80 Beitrag von el Capitán » 2011-06-10 20:12:45

Hi,

it's crazy, but I see a real chance for you to finish you project! Incredible!

Good luck and have fun!

El Leon
Letzte Ausfahrt: von 10/2016 bis 06/2018 unterwegs in Europa und Asien.

Benutzeravatar
pairospam
süchtig
Beiträge: 883
Registriert: 2010-11-22 14:27:25

#81 Beitrag von pairospam » 2011-06-14 22:36:05

Hi, again.

El Capitan: I hold on to your little chance. Thanks for the trust.

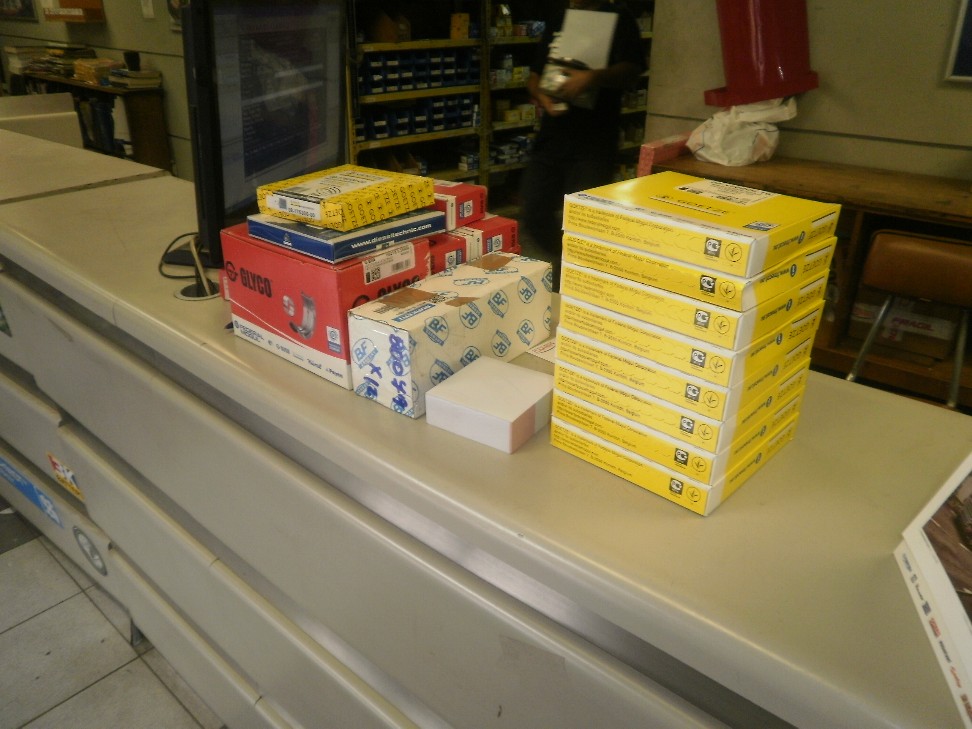
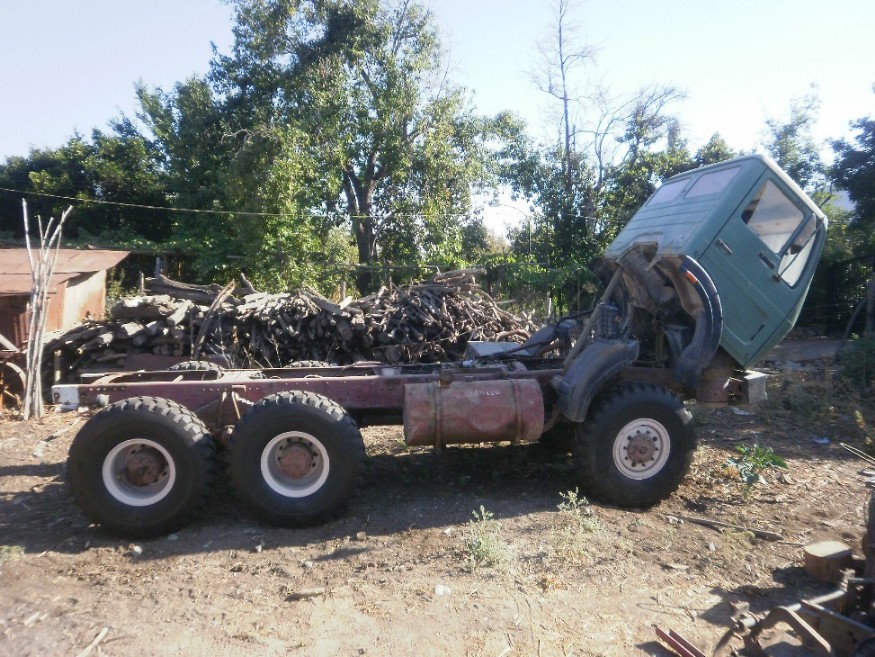
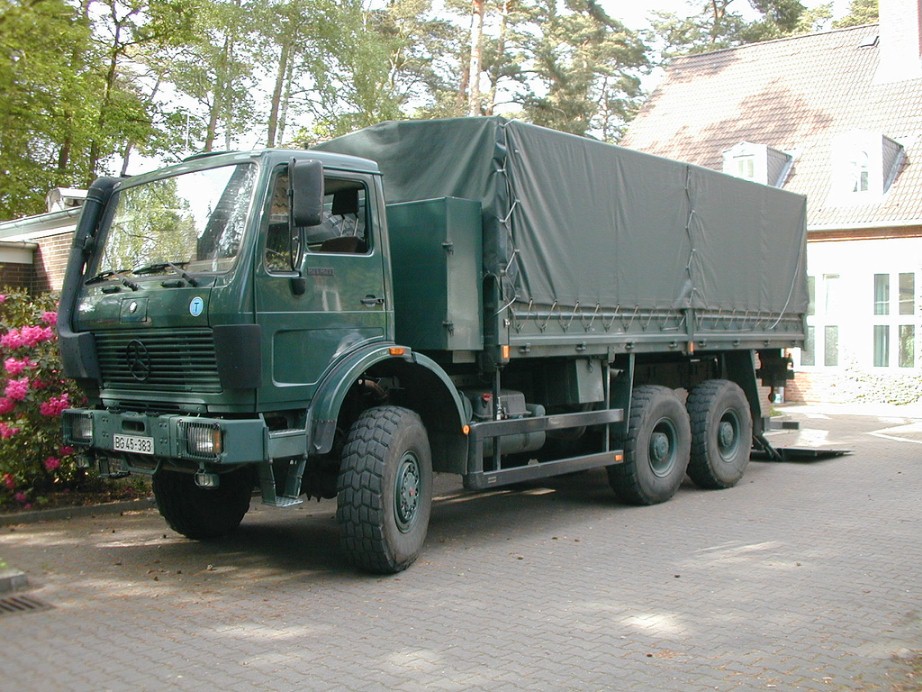
Busbart: there is a lot of spareparts around for MB trucks, and from many origins; the trouble is that this truck in particular comes directly from germany and it has some peculiar specifications for the european market quiet difficult to match, but I hope that every sparepart needed will be found.

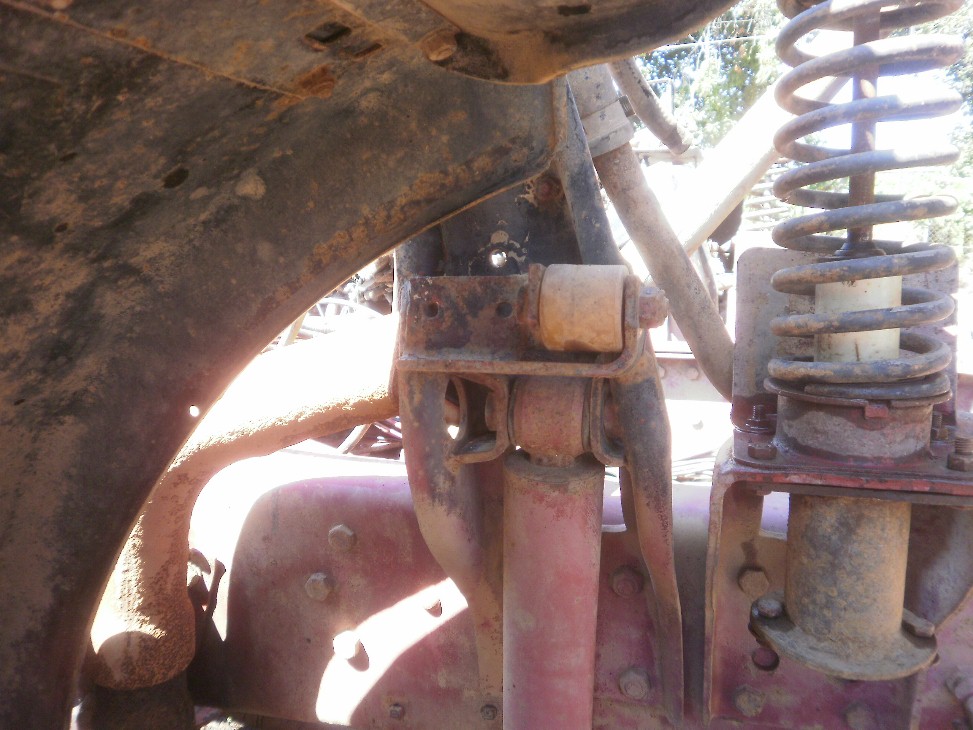
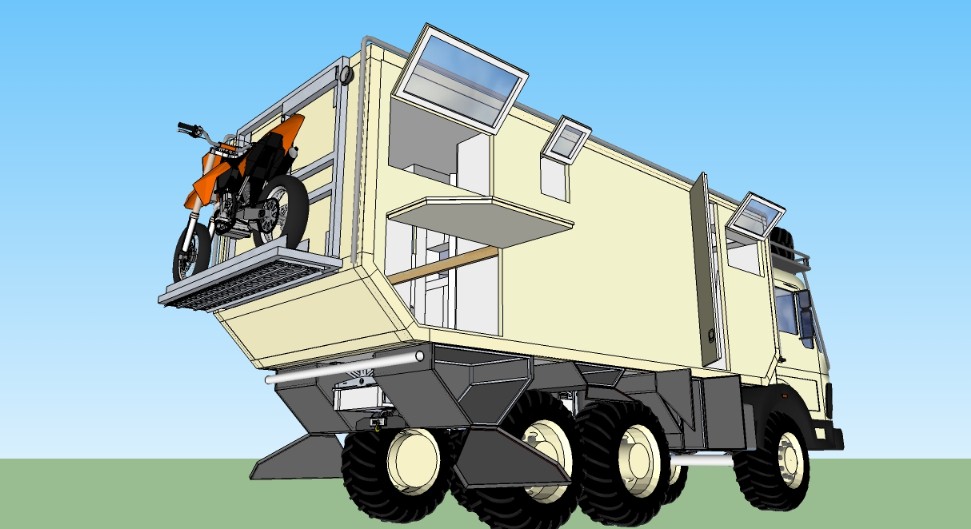
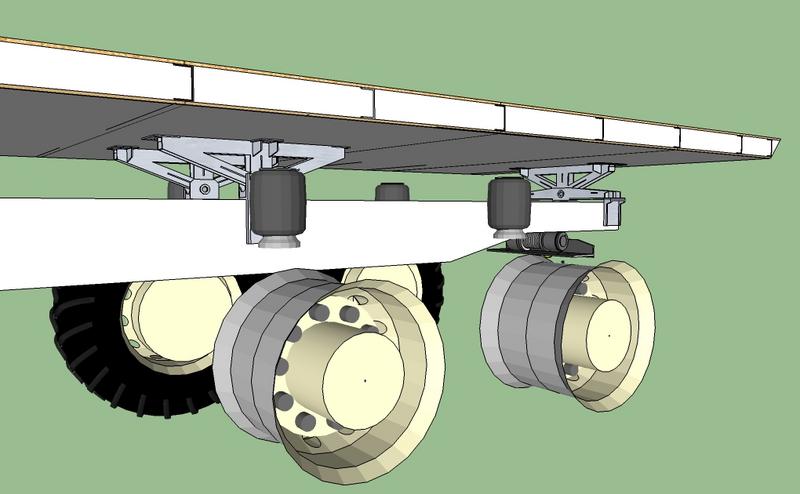
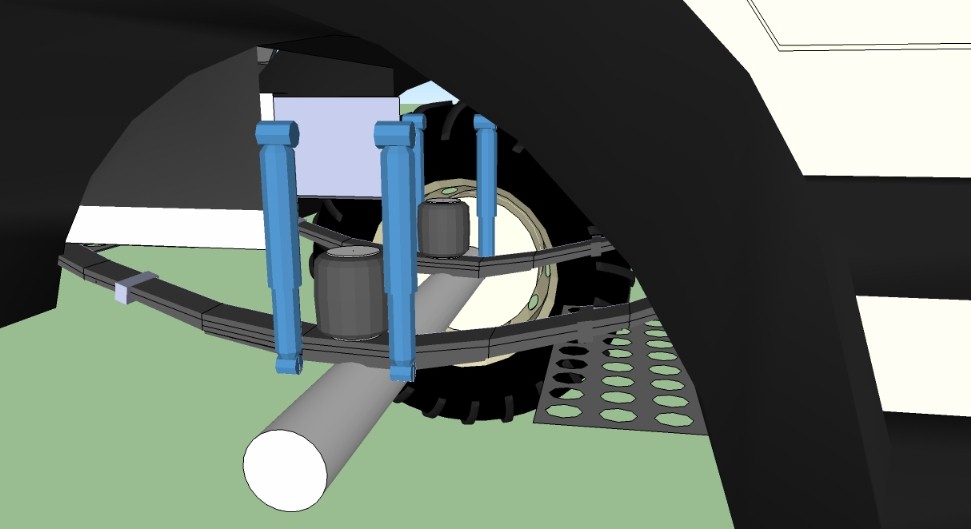
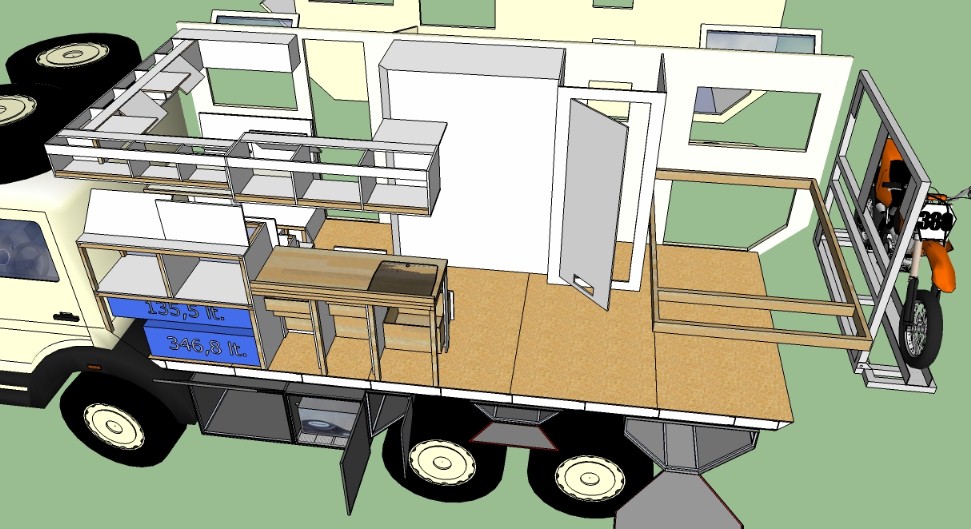
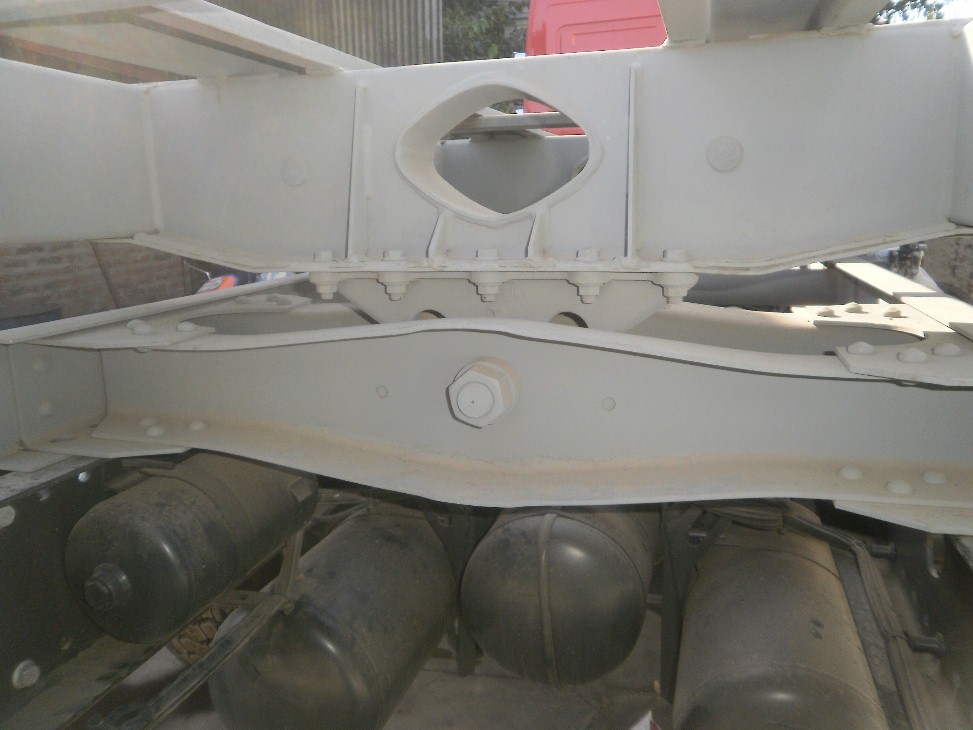
The shock absorber’s weird base with the plastic cylinder that guides the cabin when tilting back appears next. Here, to adapt the cabin suspension from Spare, the base must be modified putting a second cylinder to guide and also support the cabin in the front-aft direction. This is needed as the cabin will rest on the frontal suspension from Spare and on the “floating” rear coils from the original truck and much weight will be added on the rack.
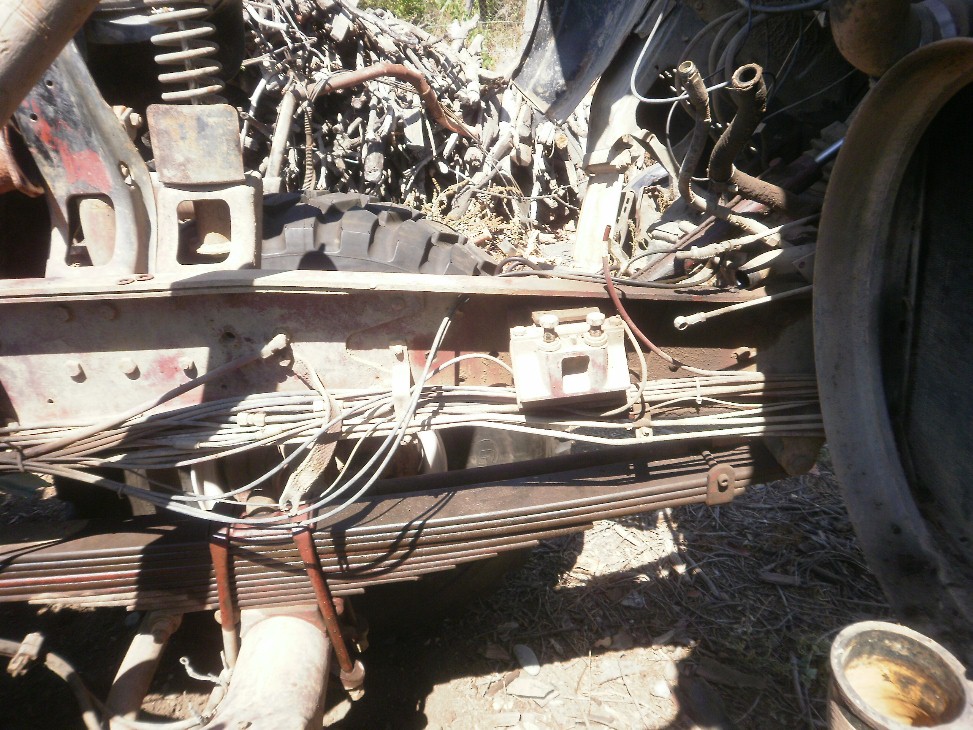
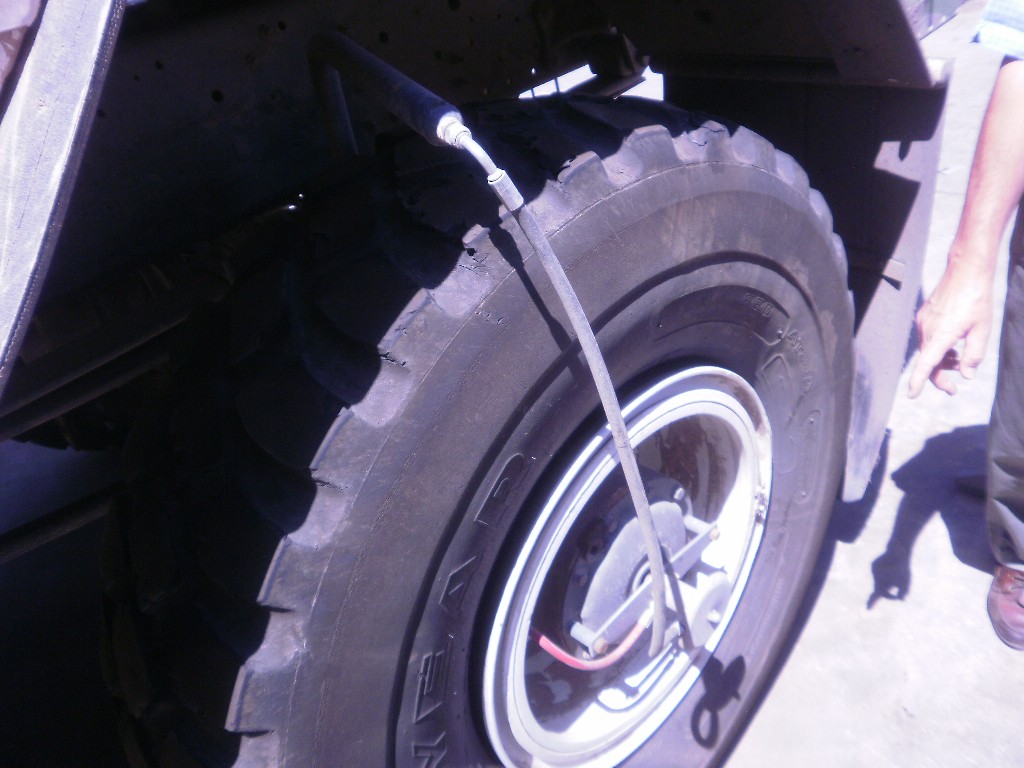
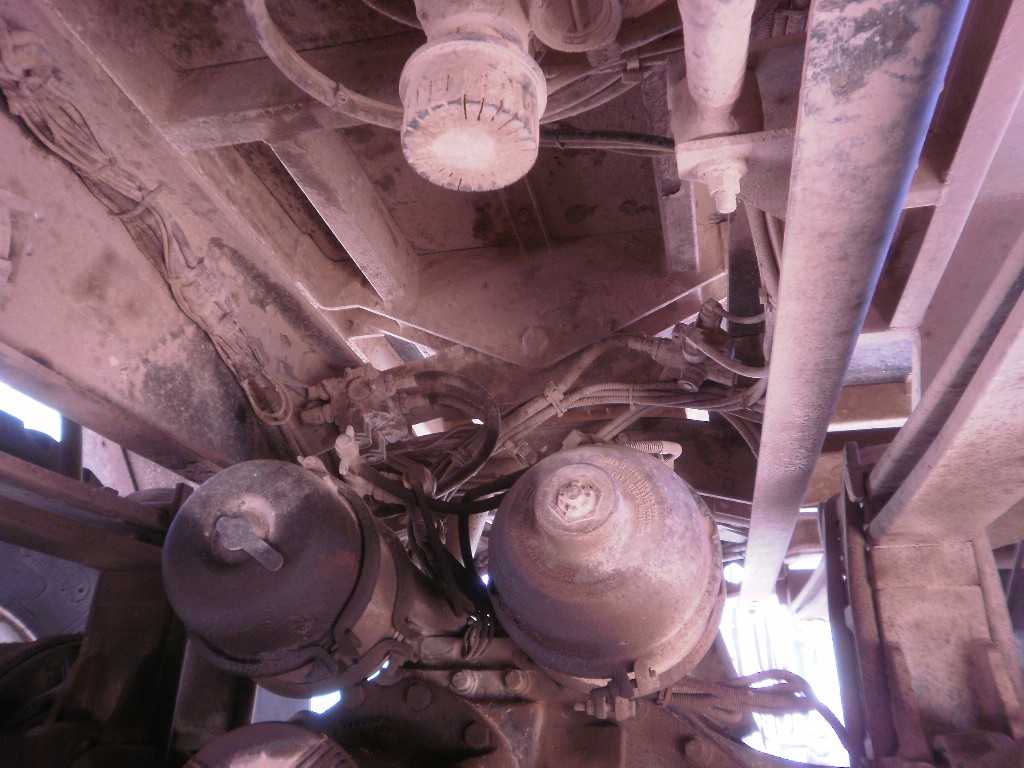
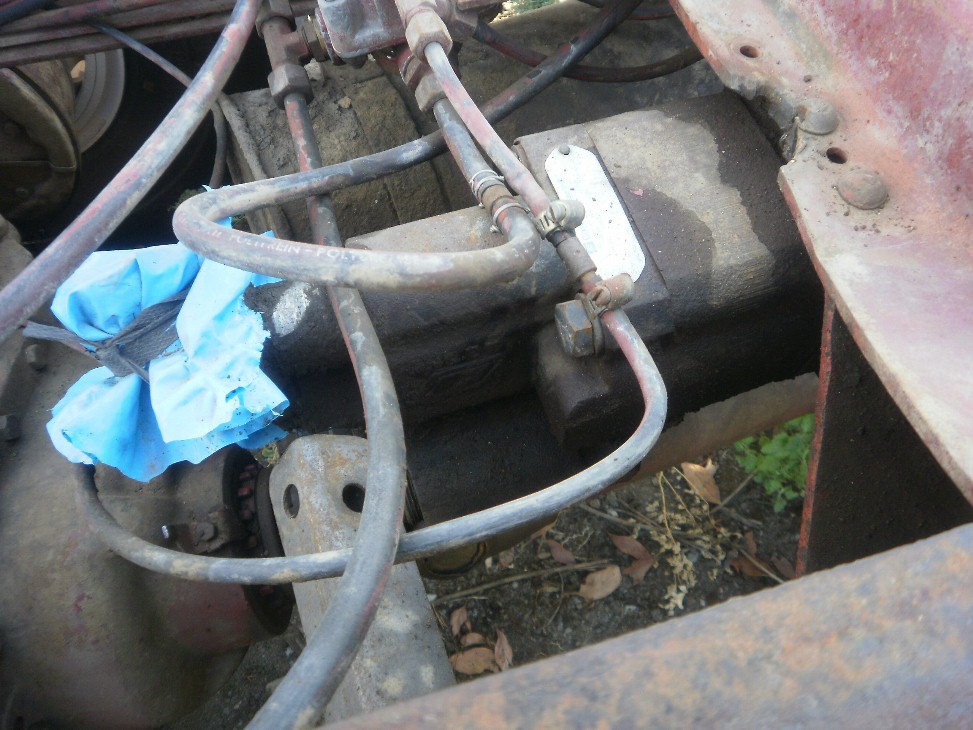
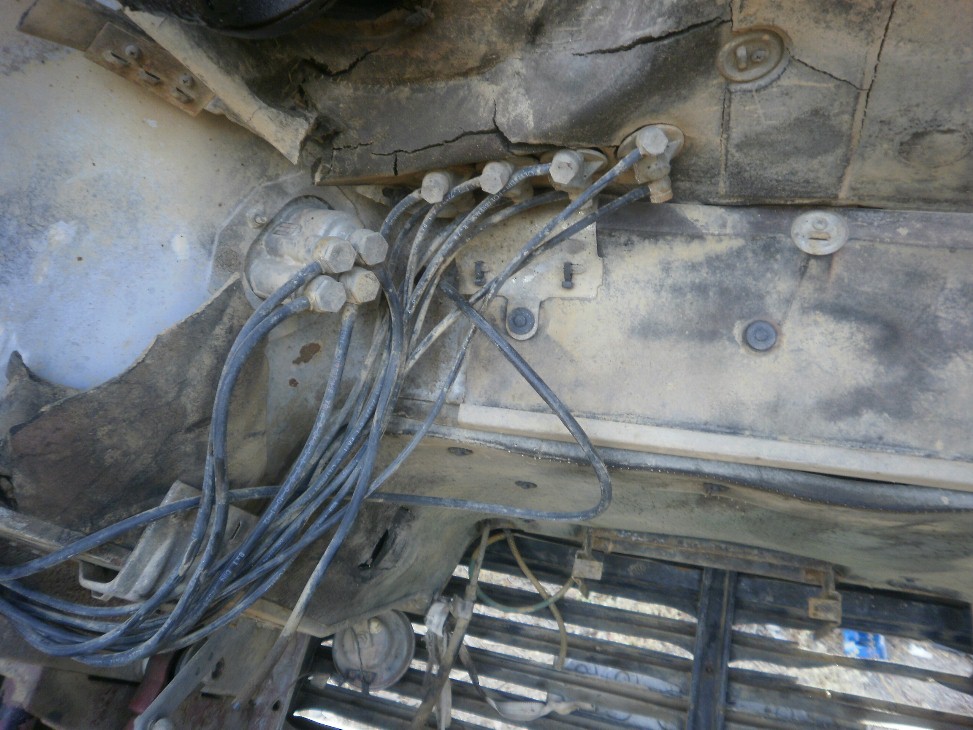
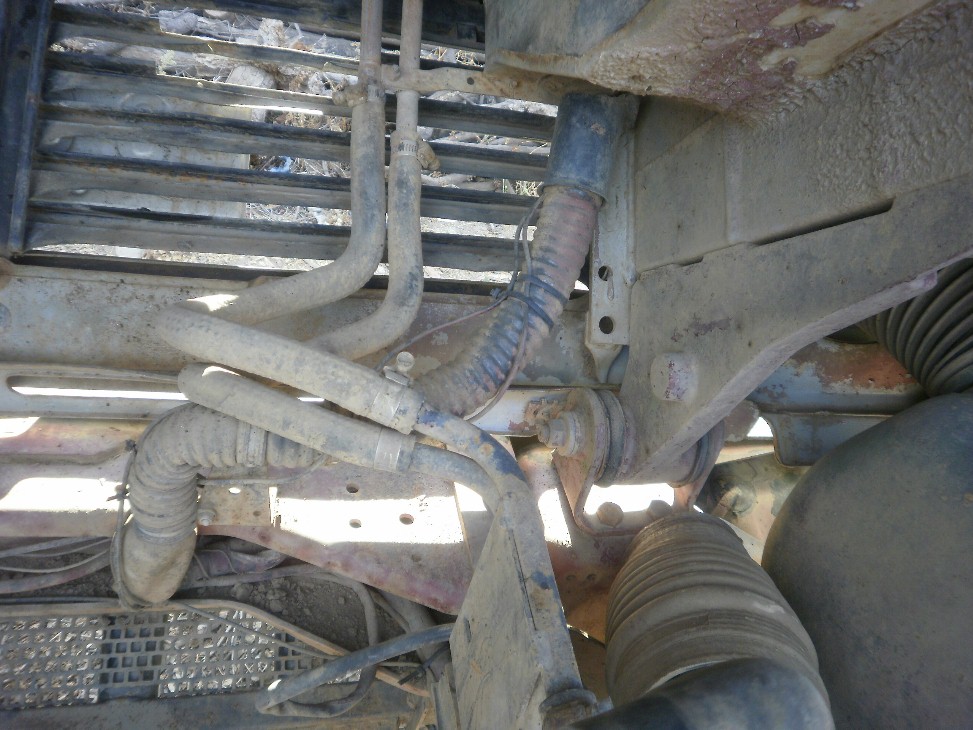
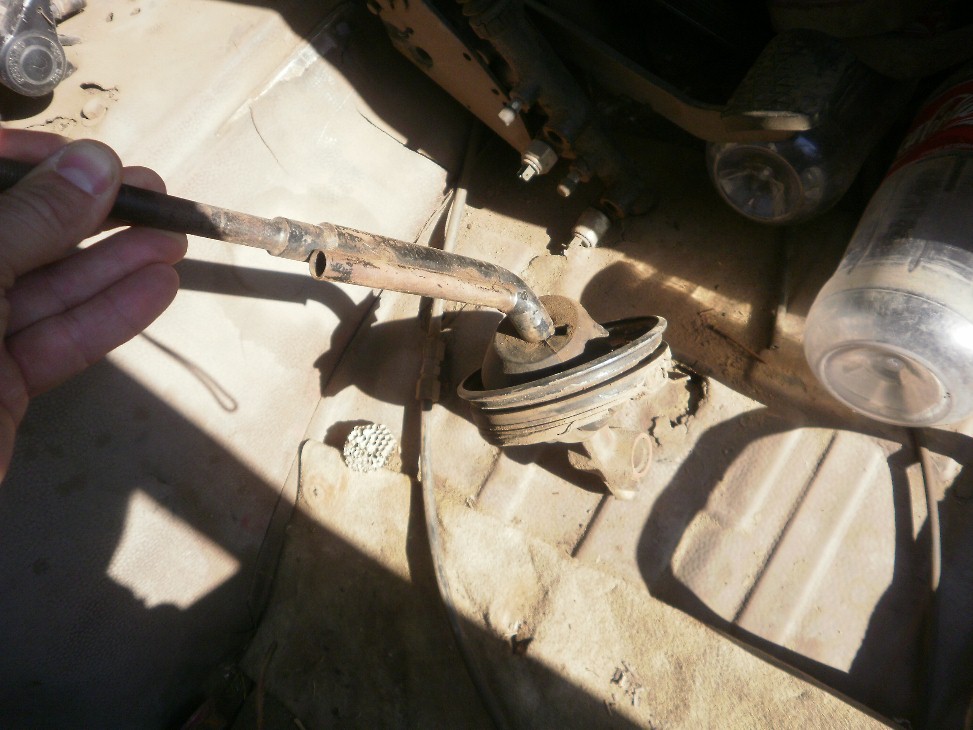
At the moment of taking the pictures to all the cables, tubing and Tecalan I felt shivers on my spine at the thought of the amount of work when it came the time of taking all of these off, cleaning and painting the frame and putting all back in order.
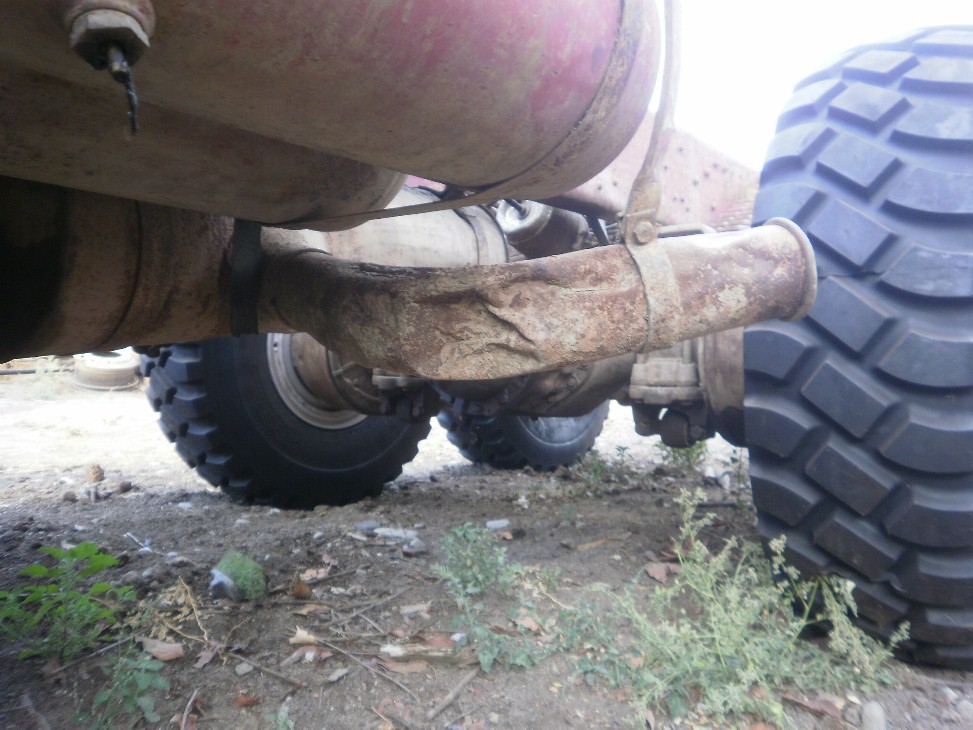
One of the postponed works was the one to be done to the exhaust. The idea was to lift the silencer as much as possible and to repair/replace the bumped tubing.
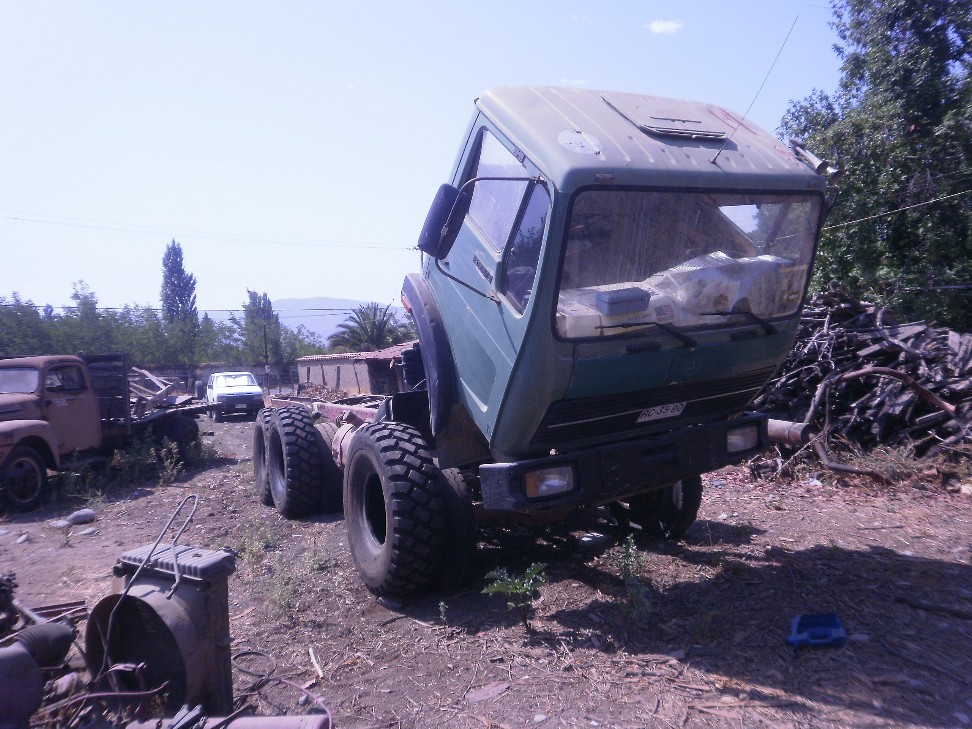
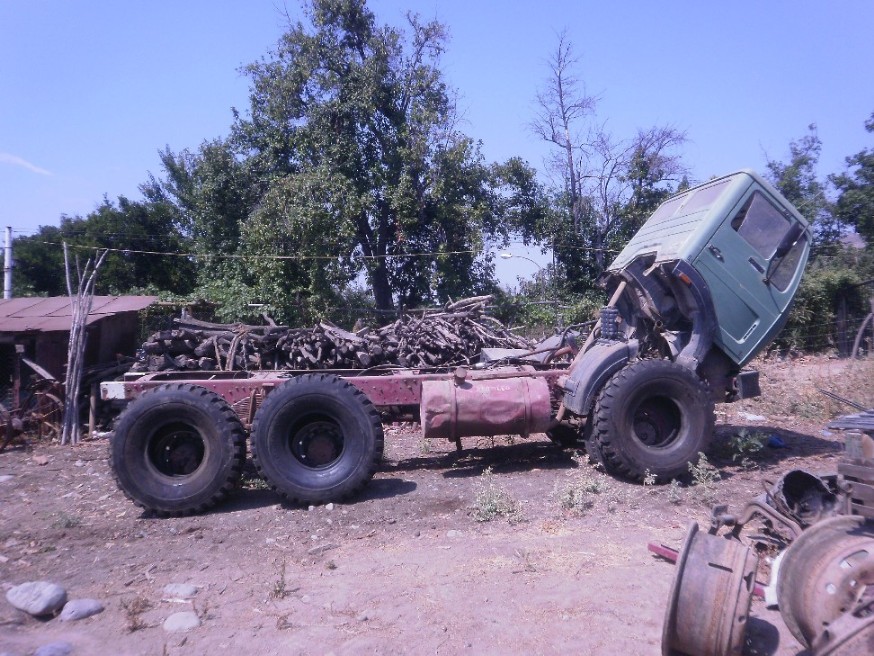
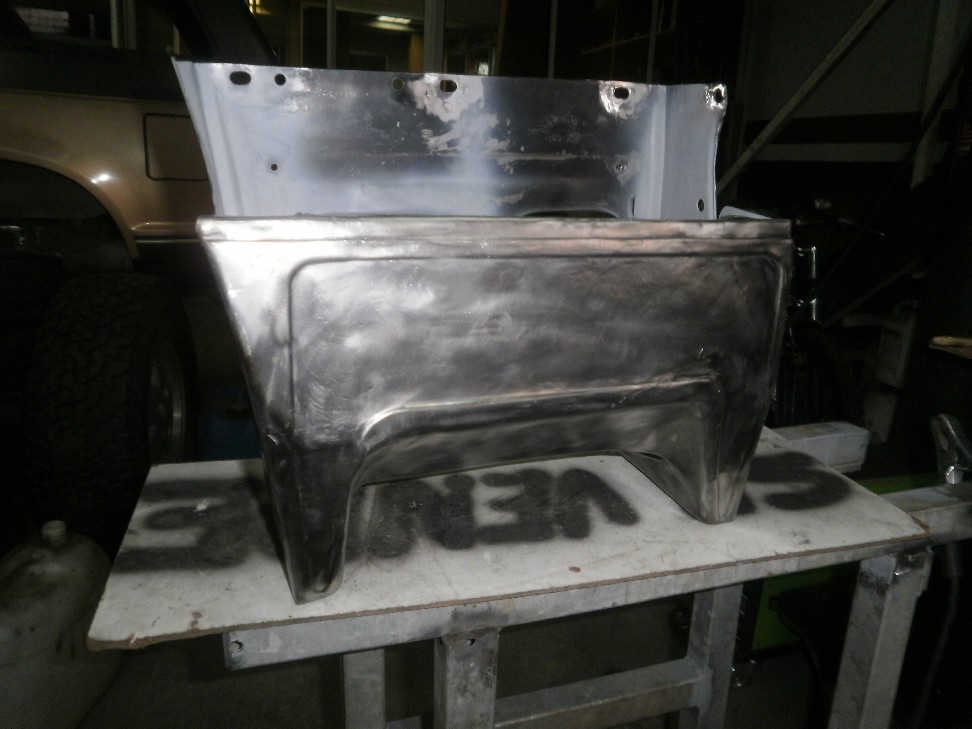
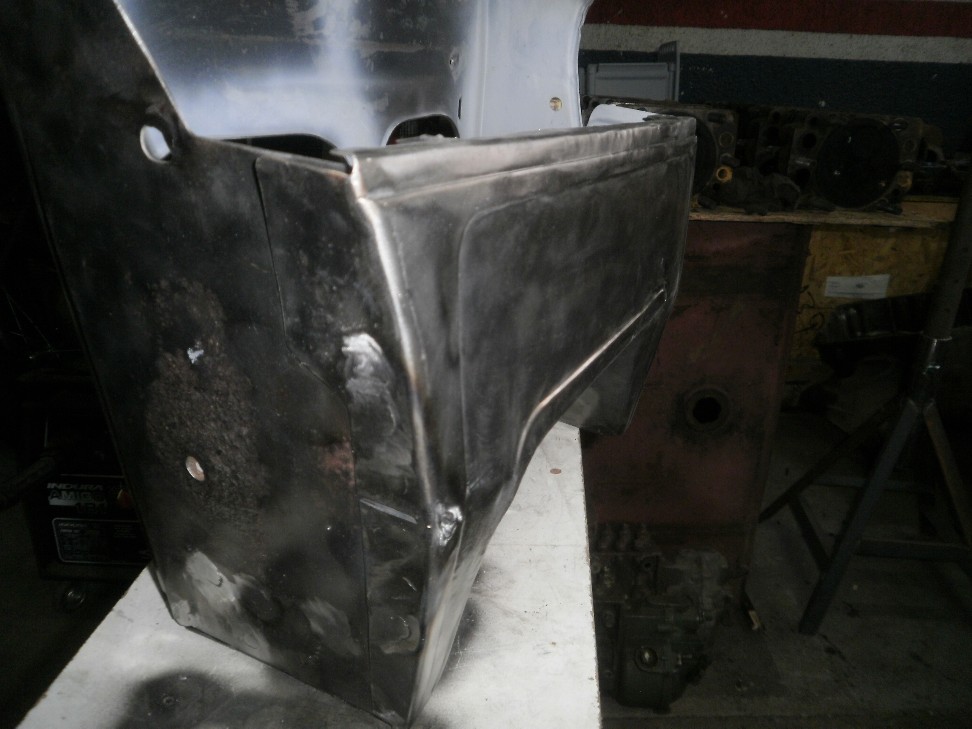
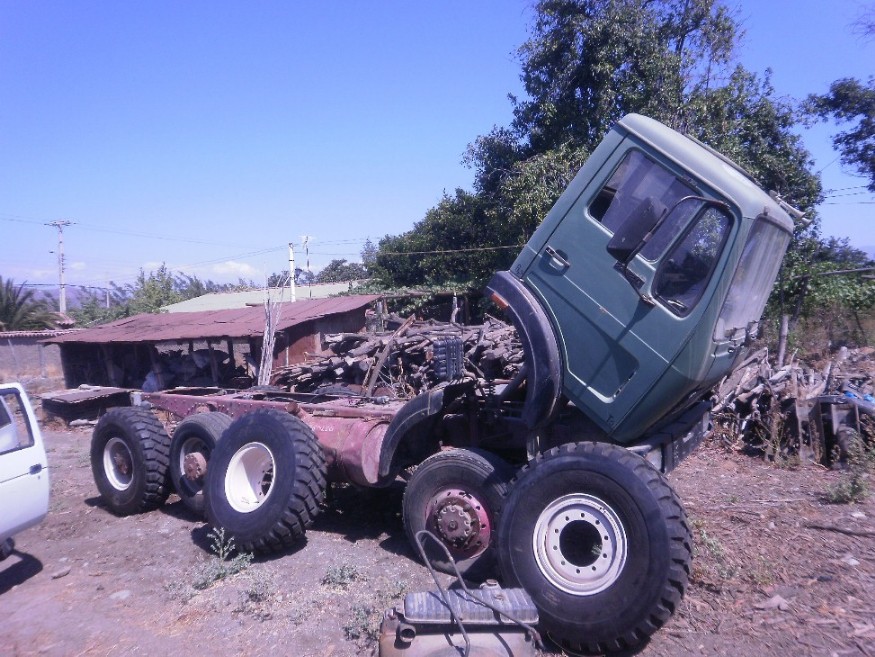
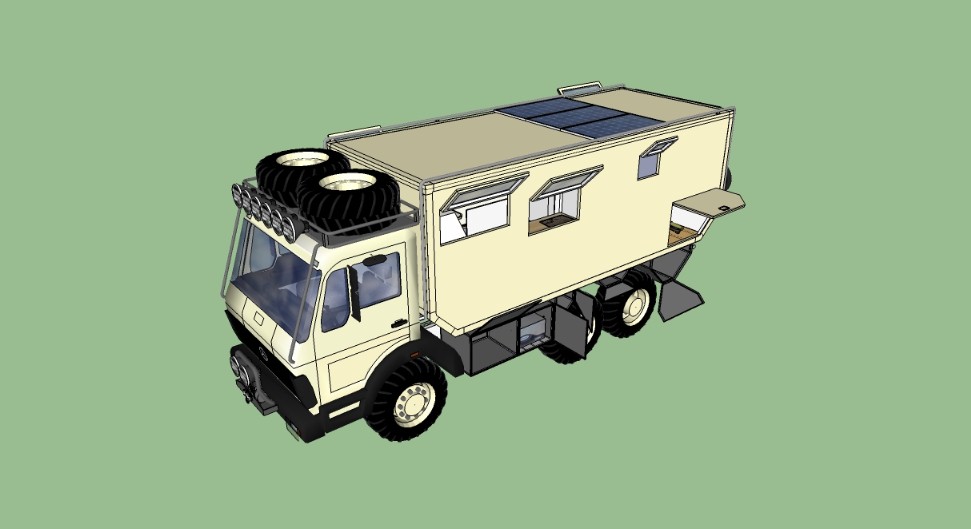
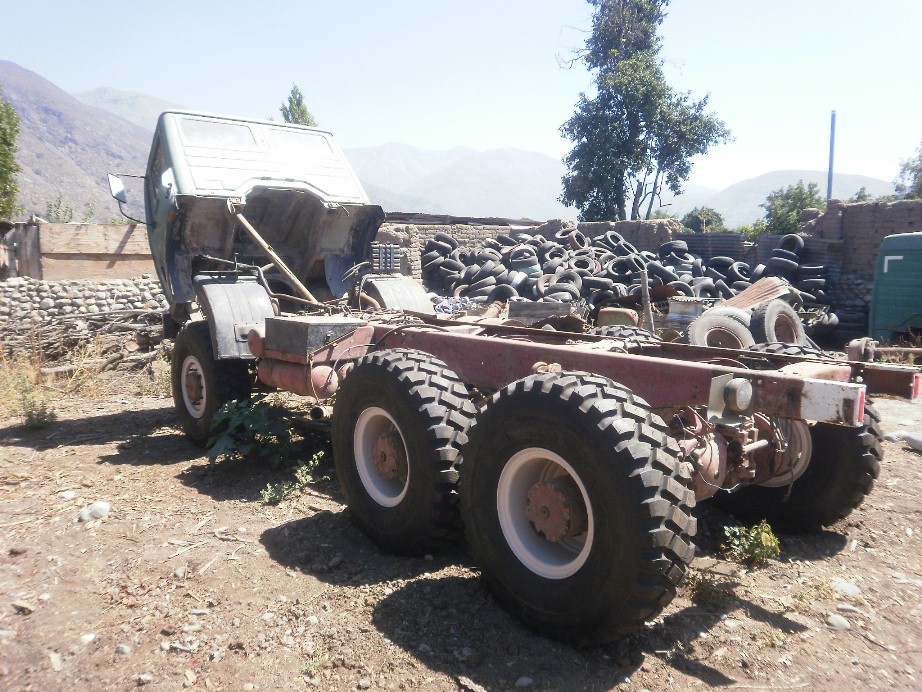
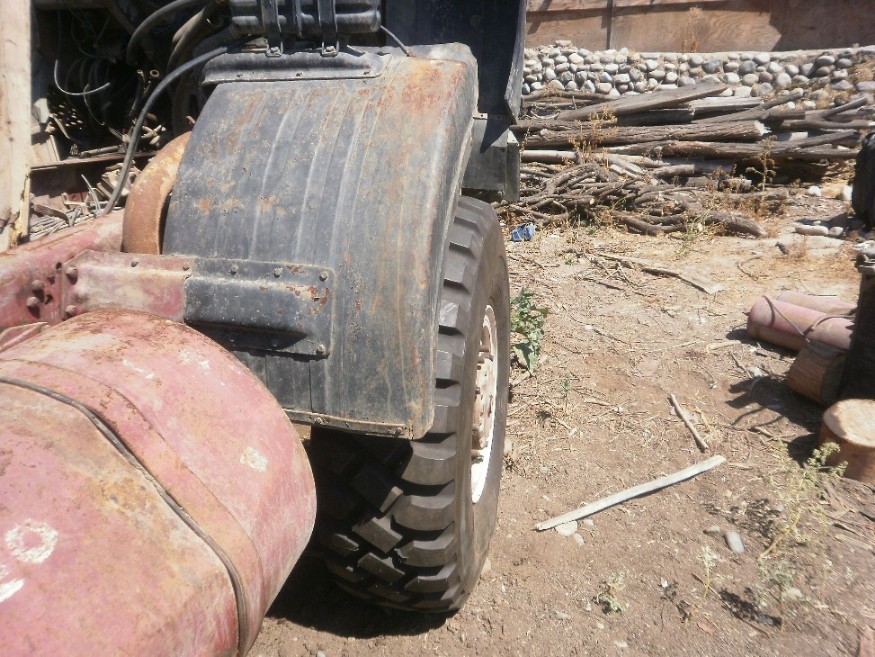
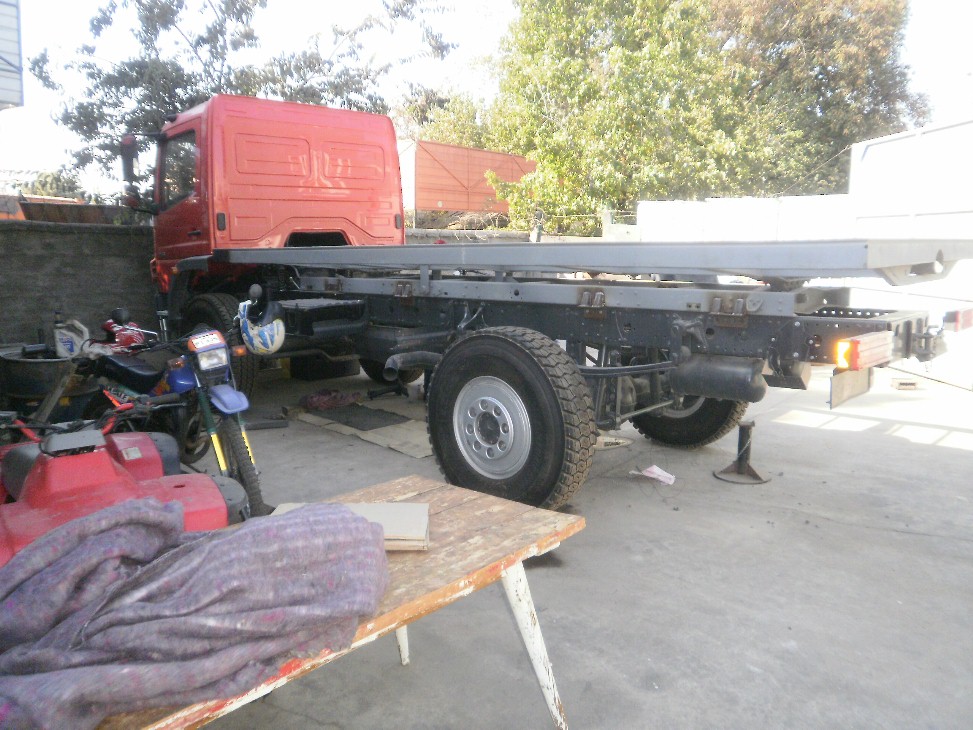
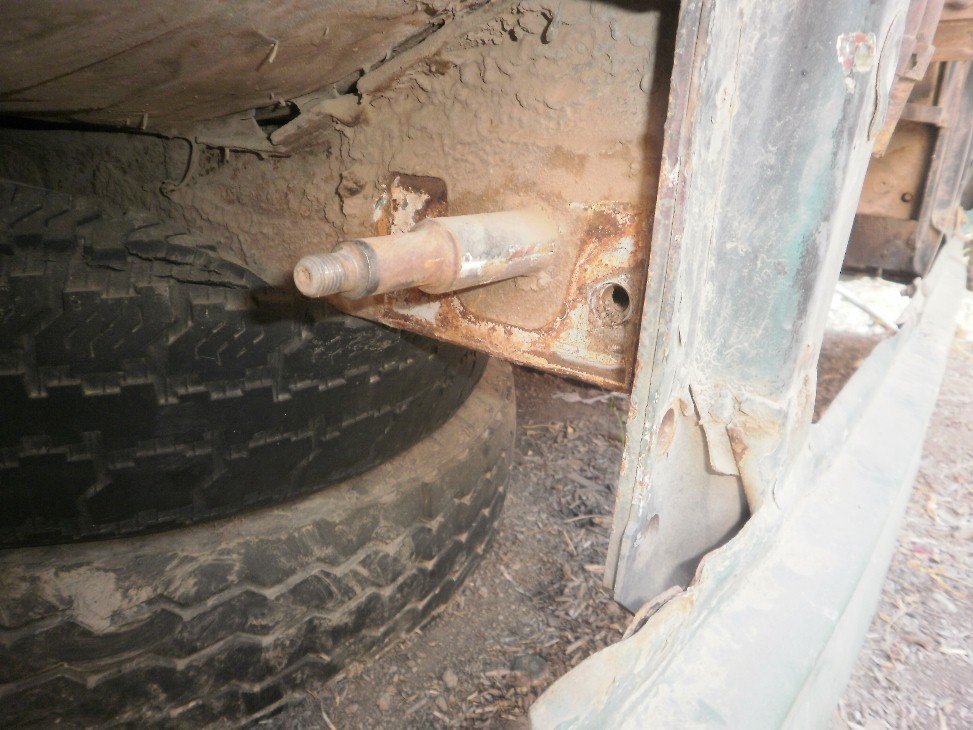
Did I say that to install the Box I need to stretch the chassis of the truck by 43 cm., reaching the maximum length permitted by law according to the wheel base? Well, to do that I need to take off the pretty much vulgar white painted pieces of steel from the side rails and put in some pieces from the untouched frontal part of the frame of Spare, the donor.
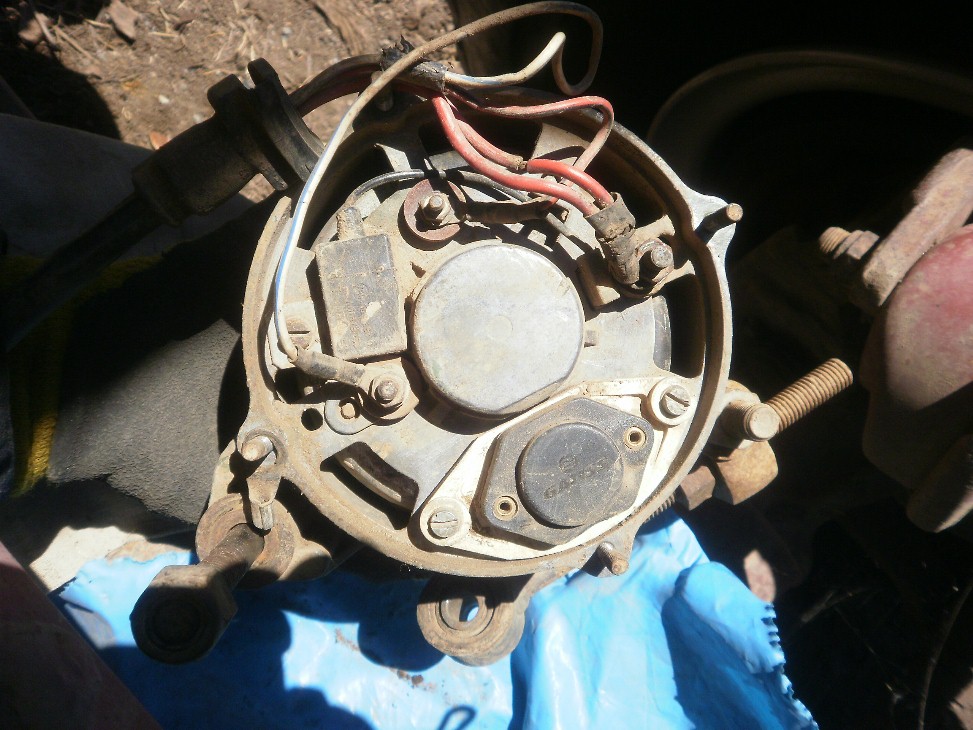
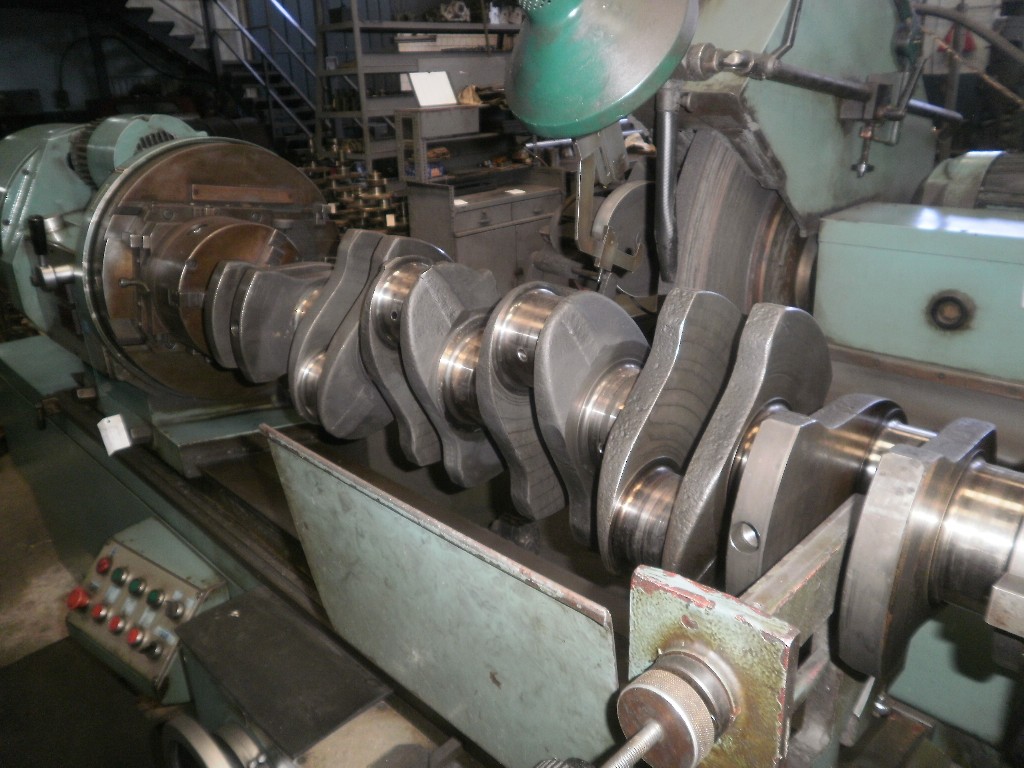
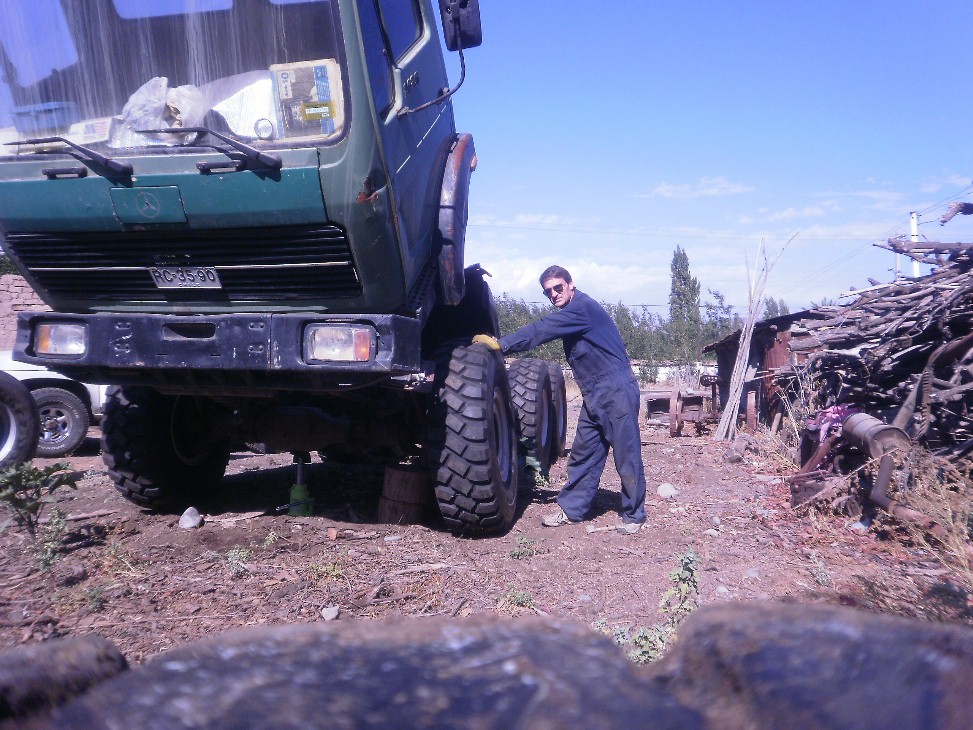
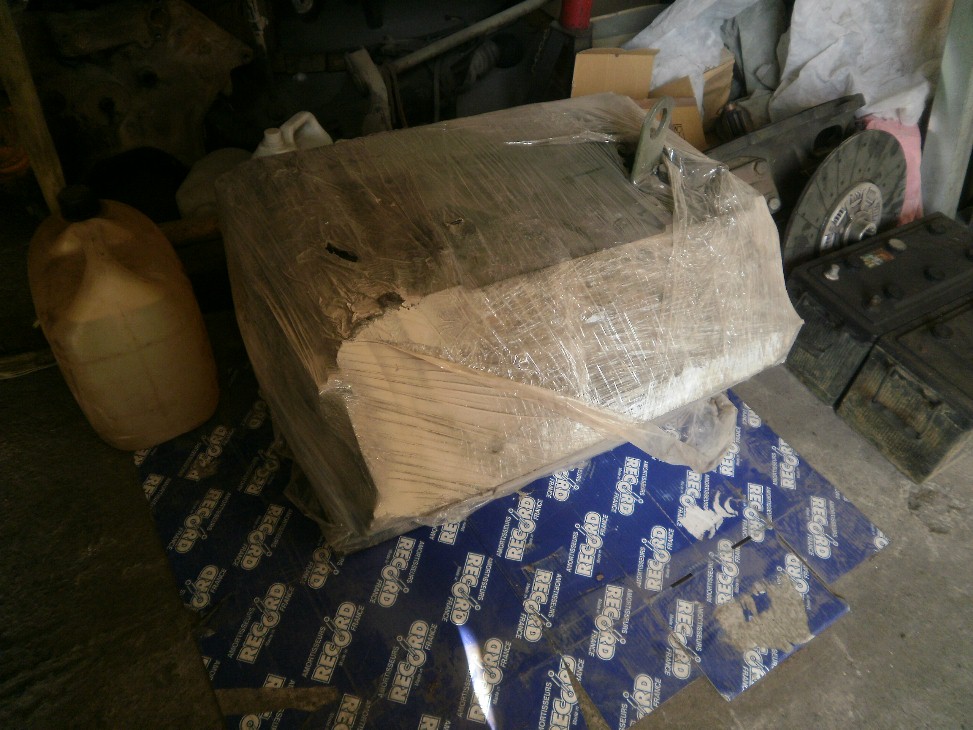
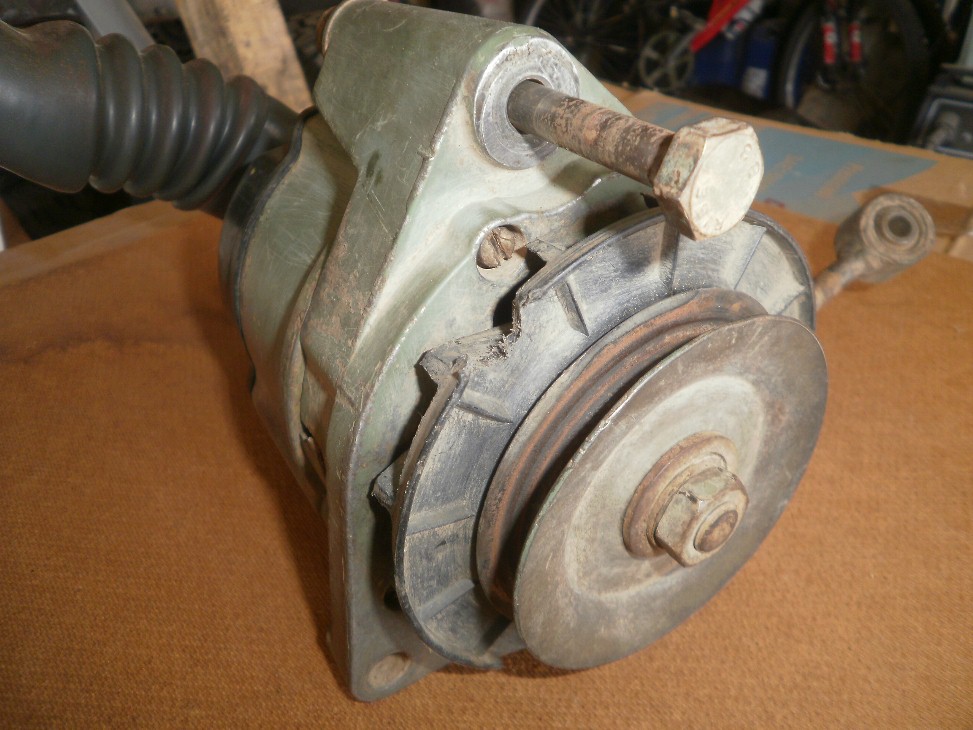
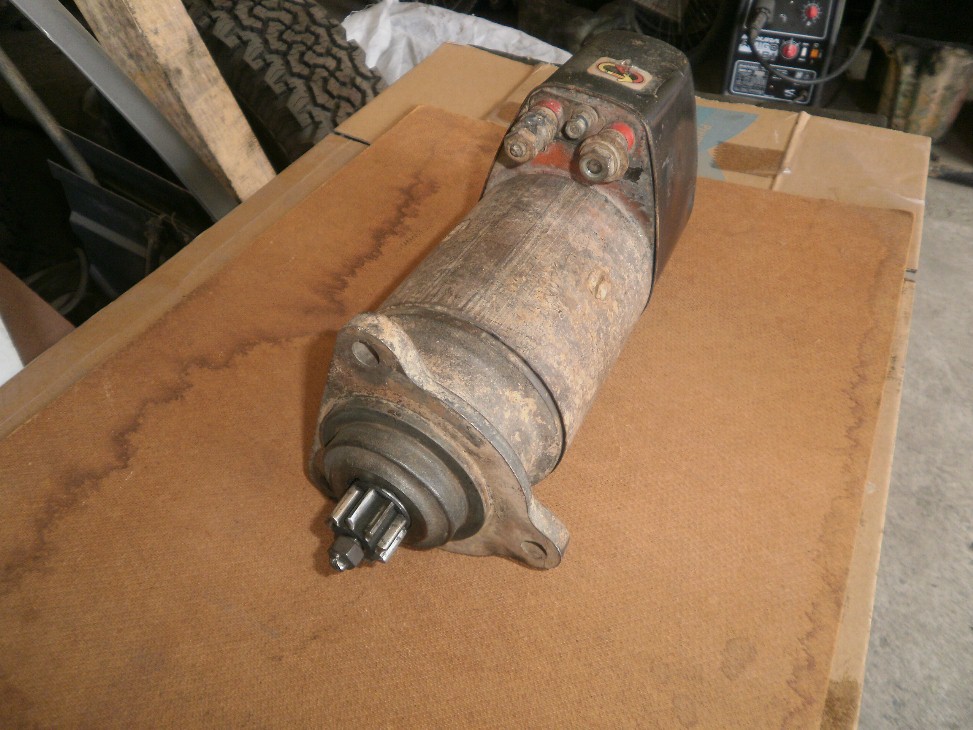
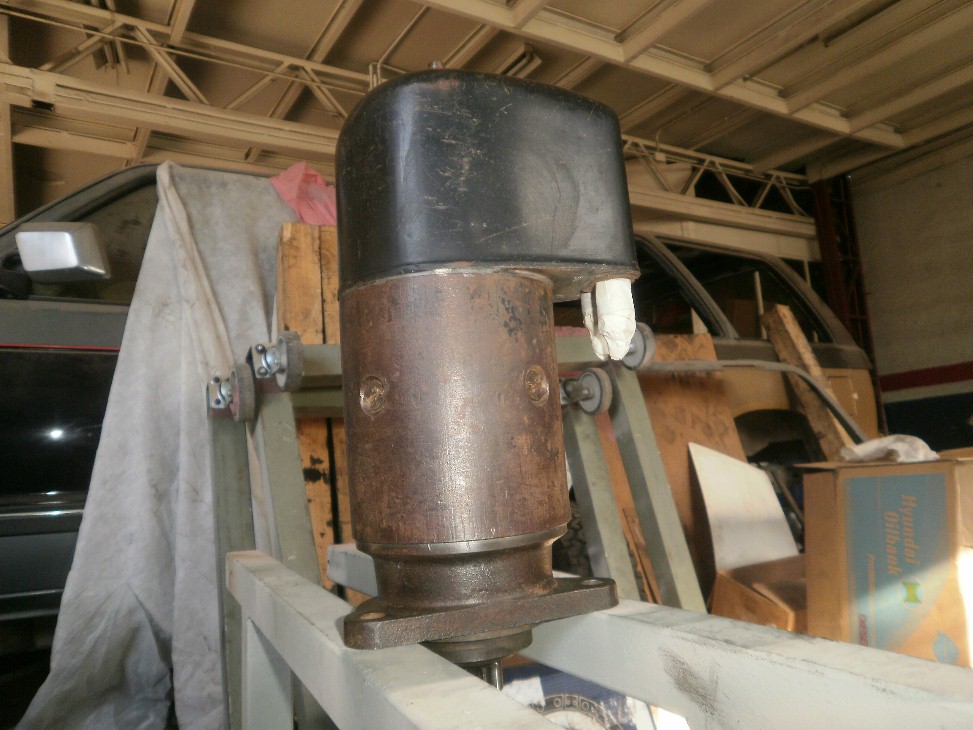
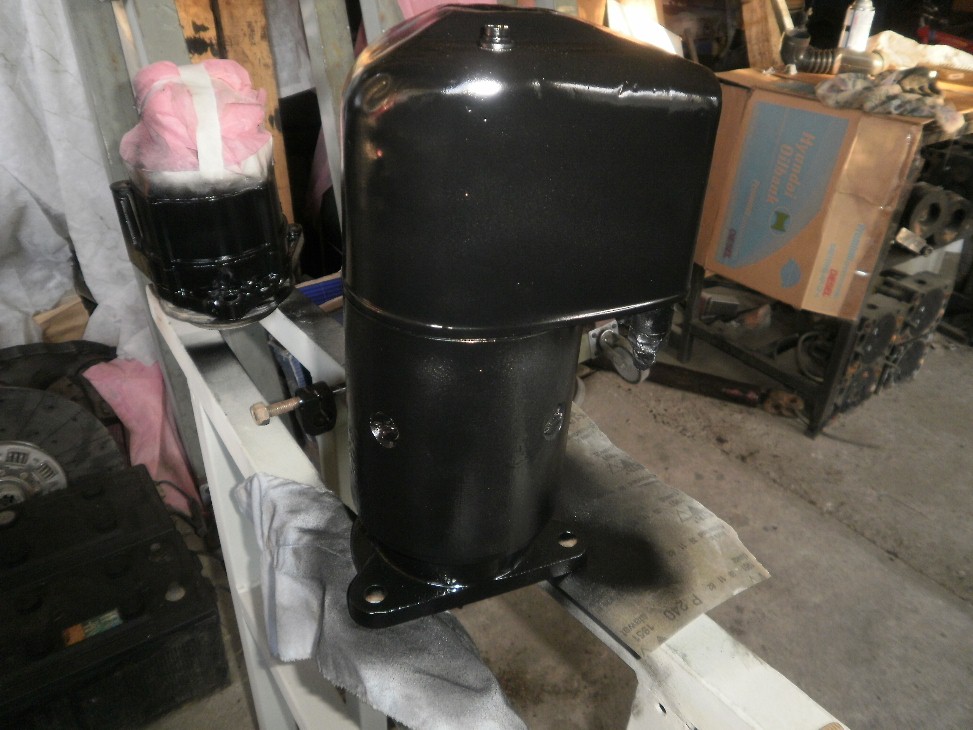
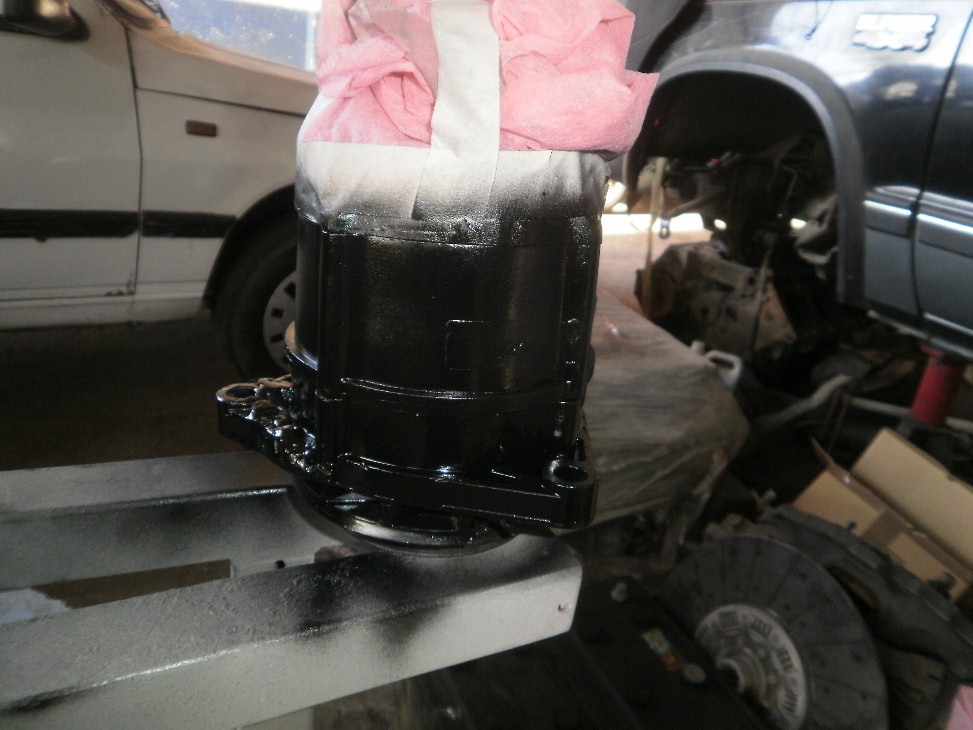
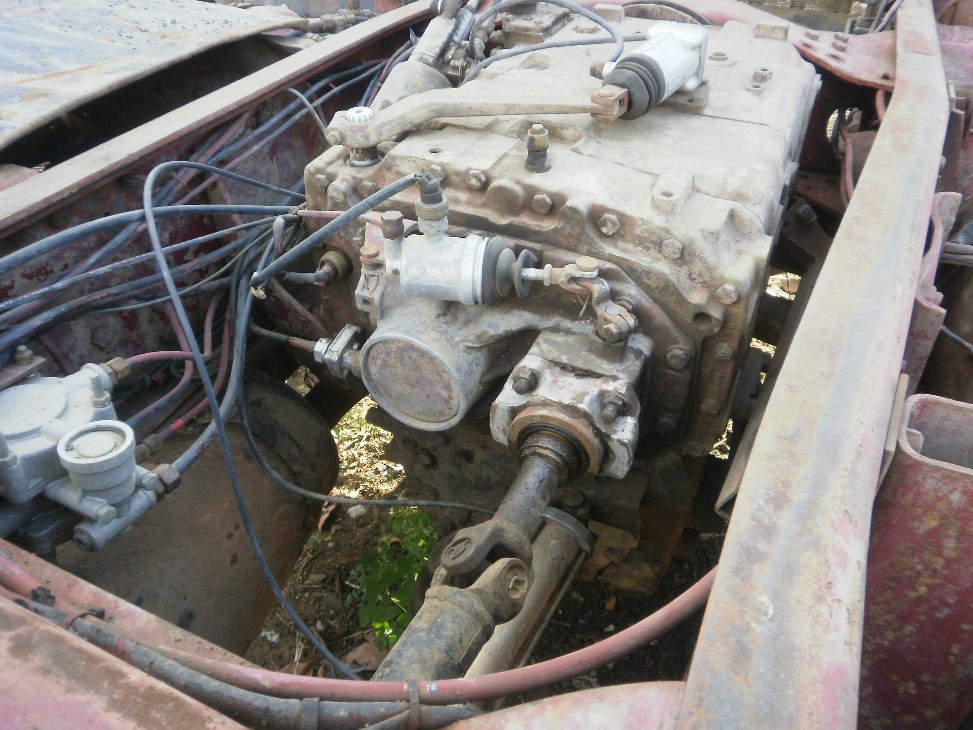
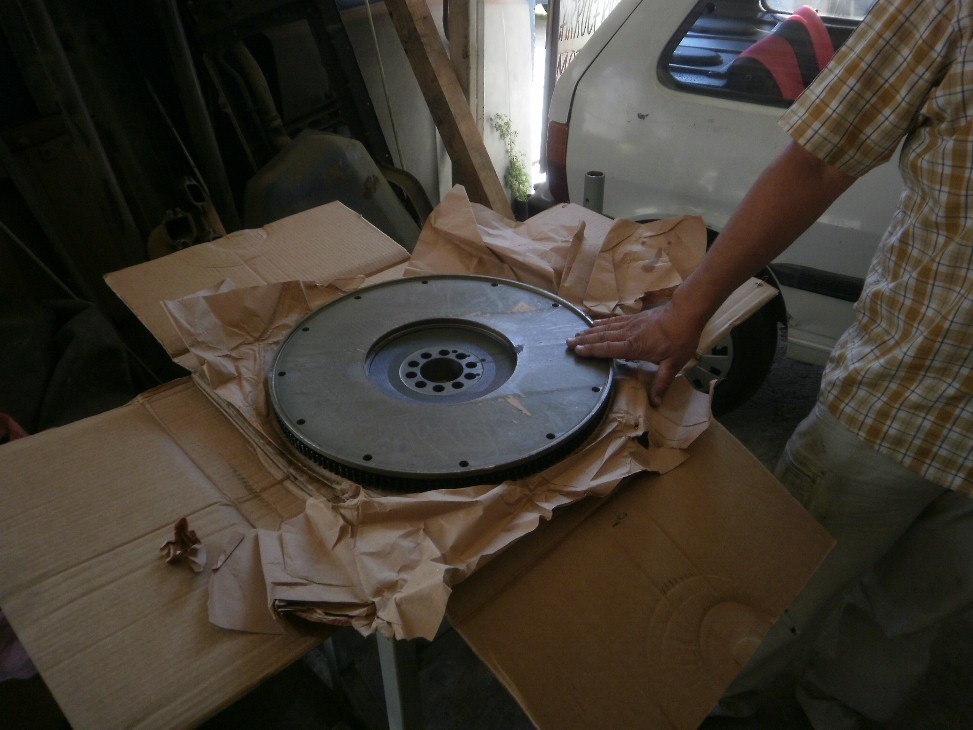
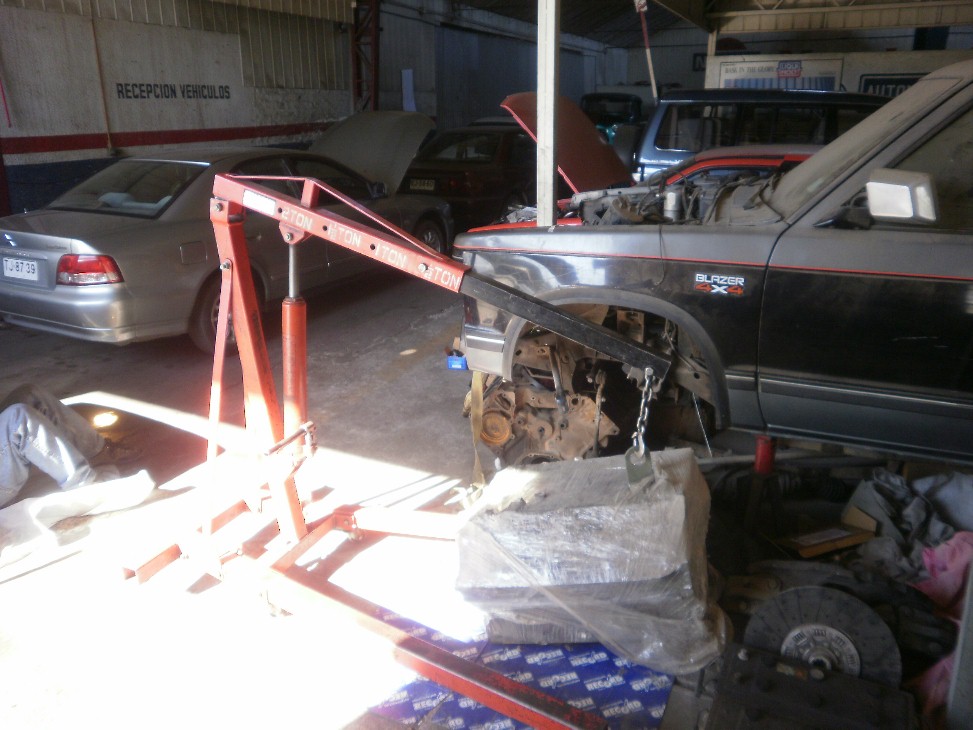
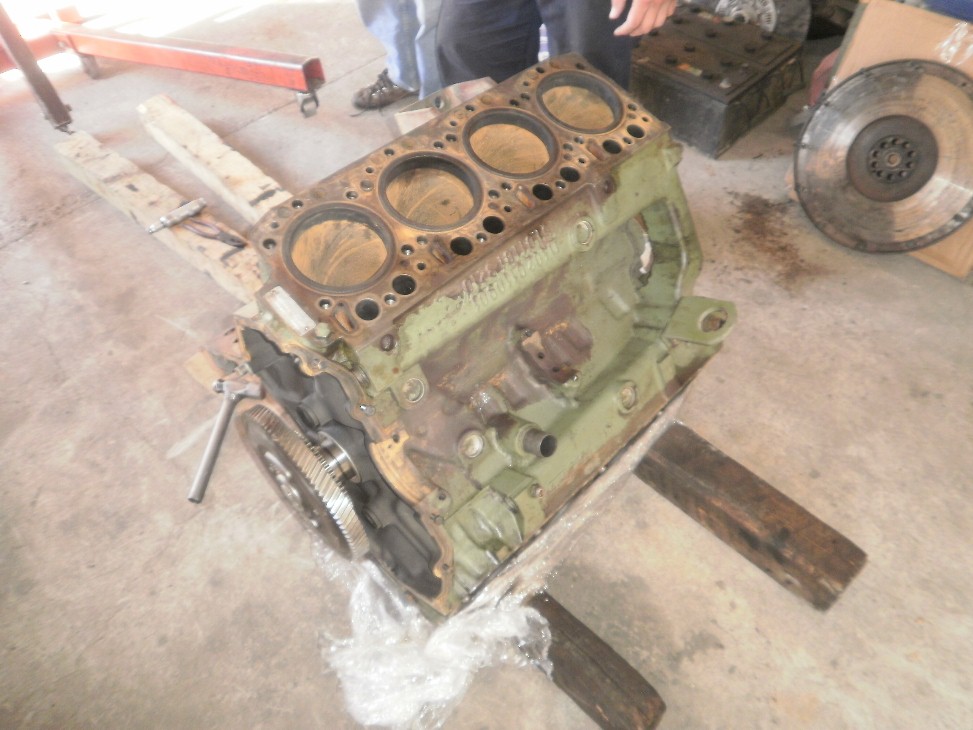
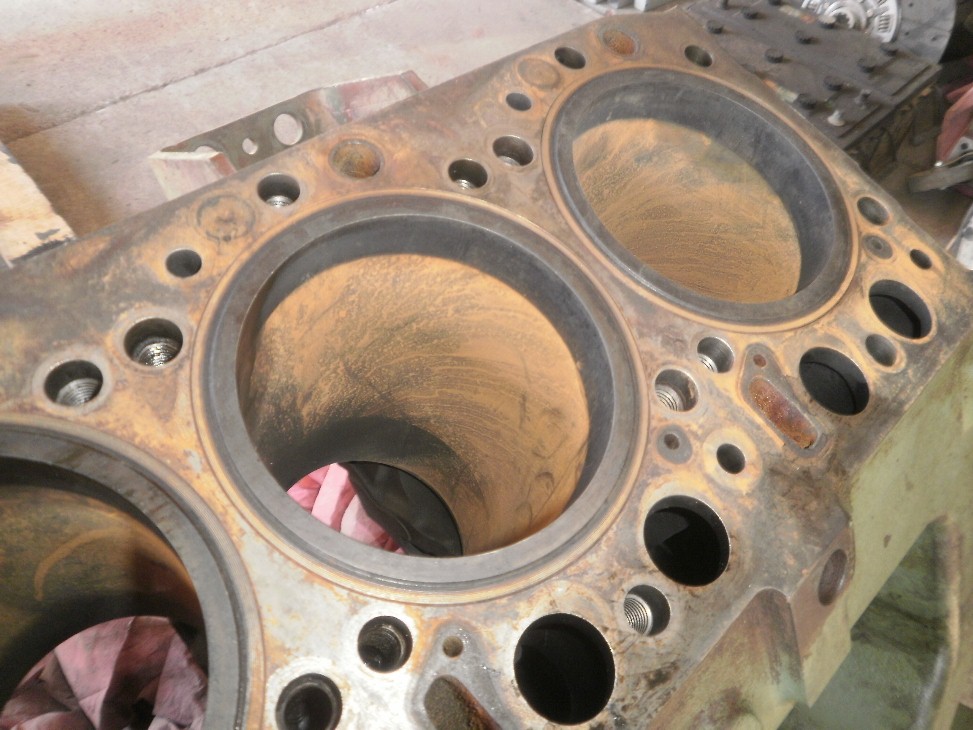
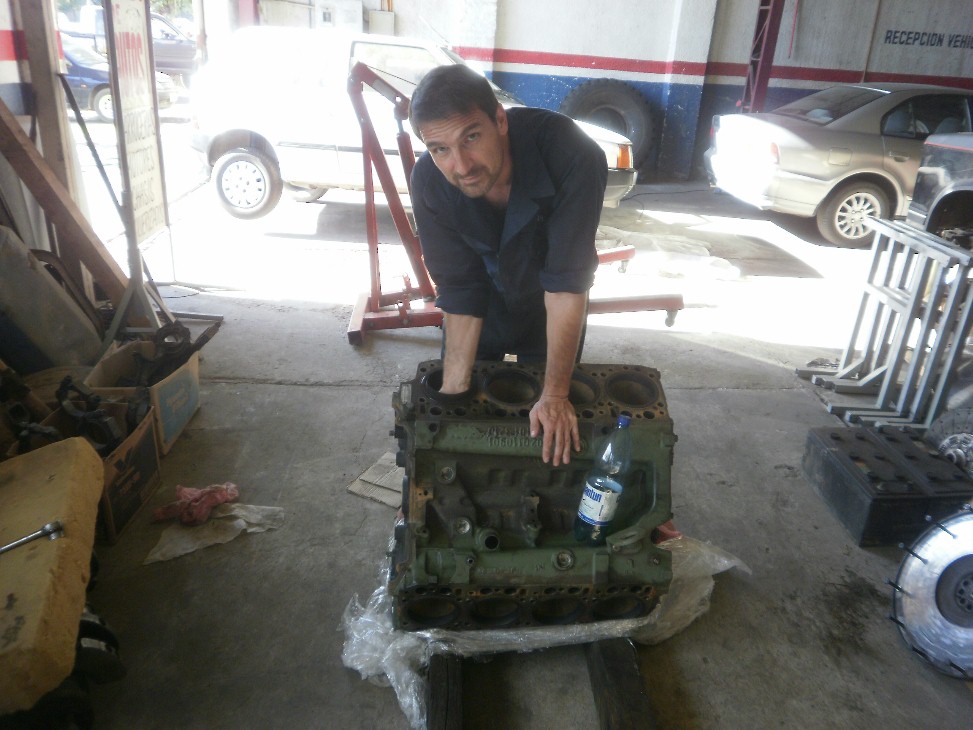
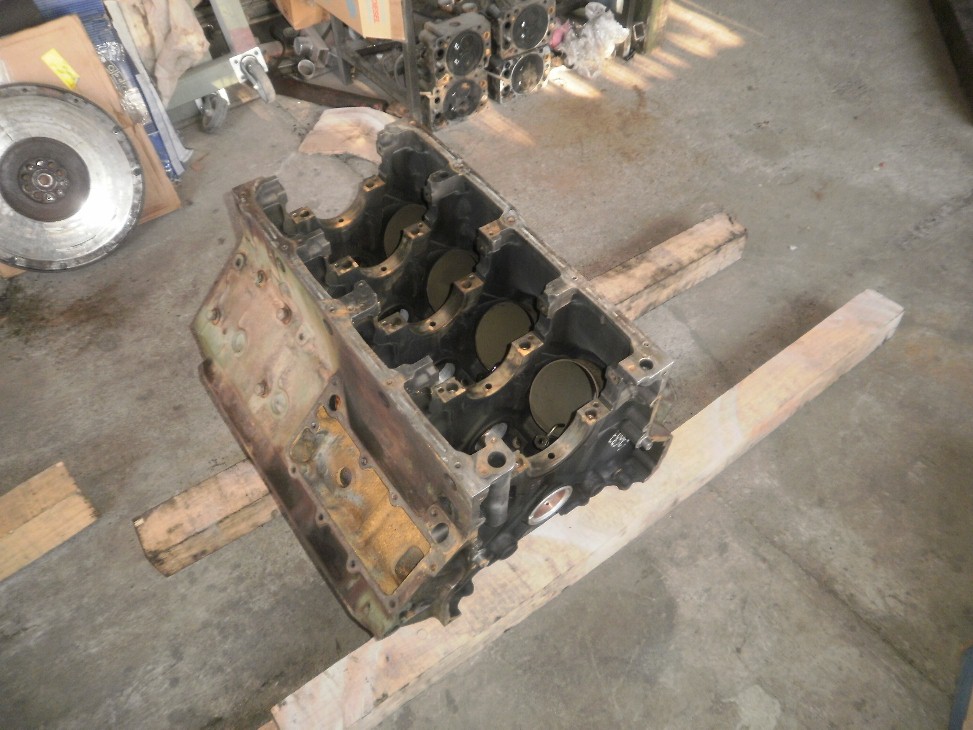
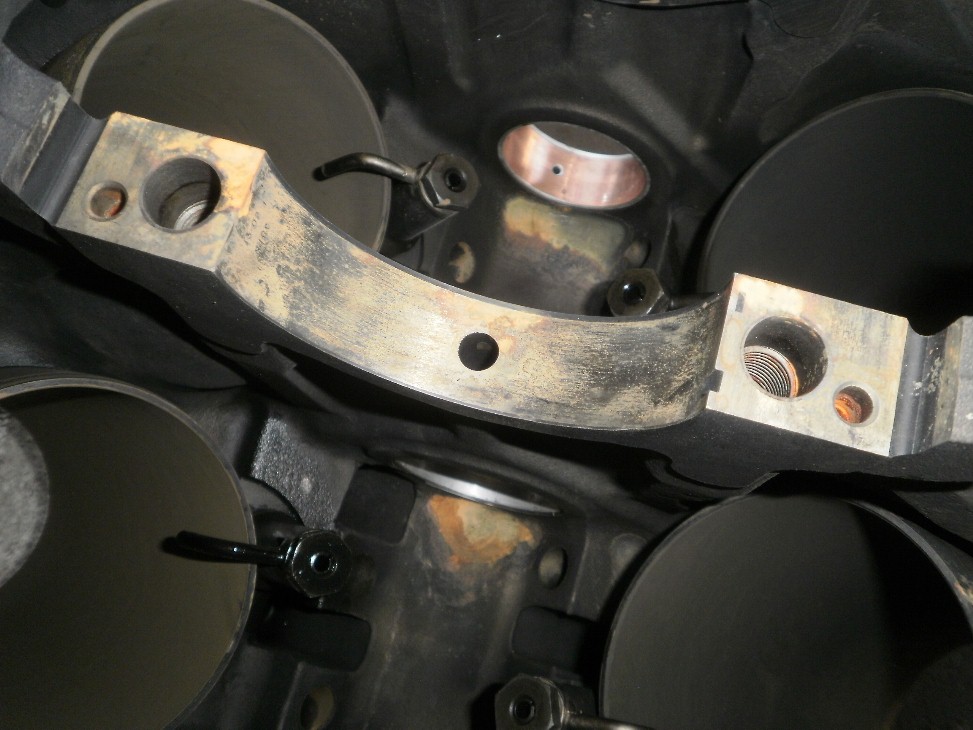
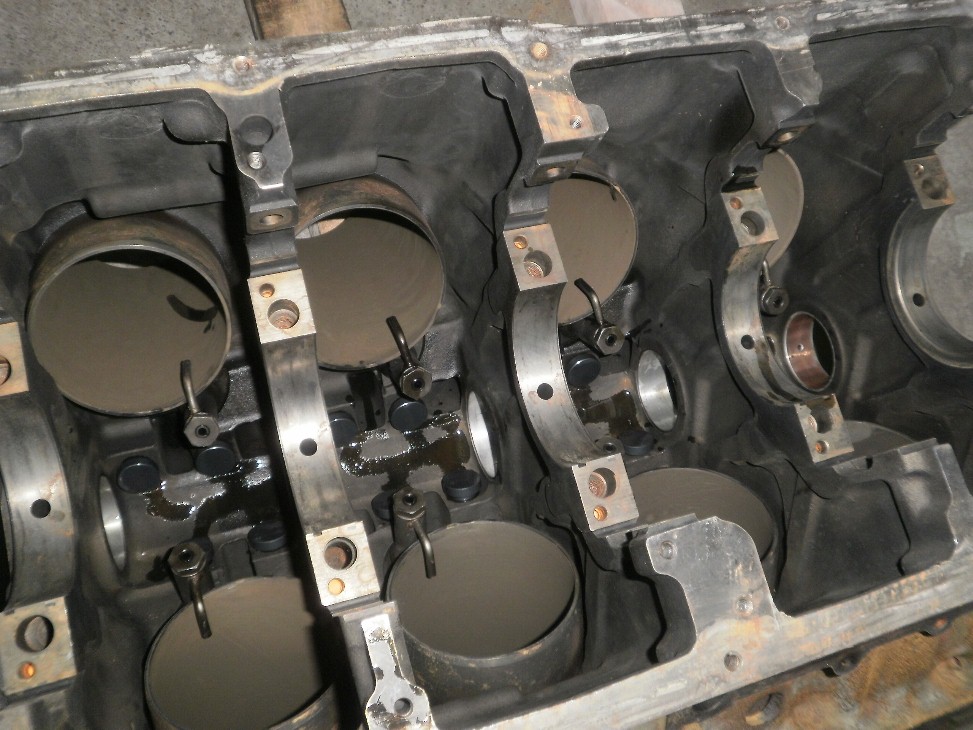
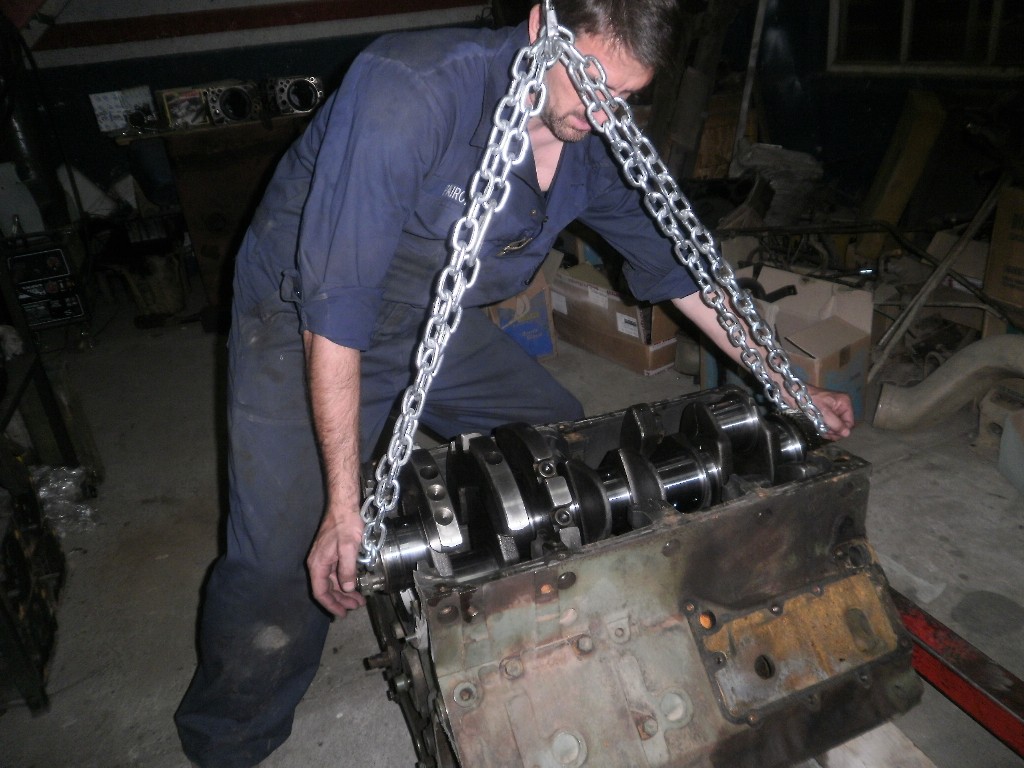
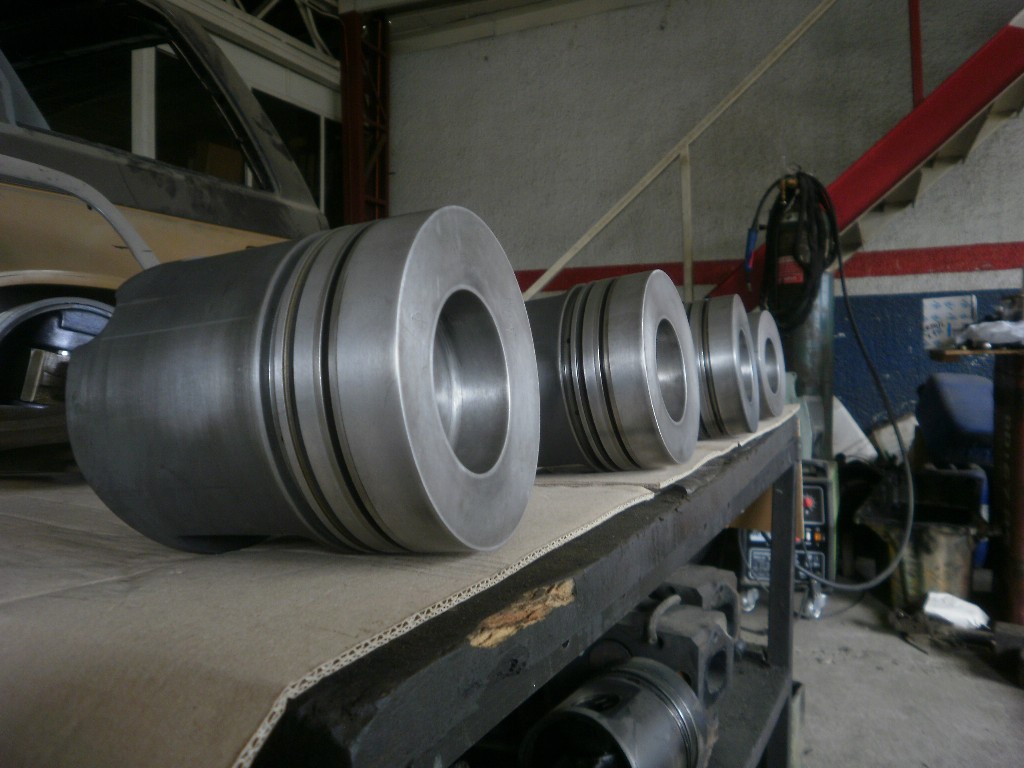
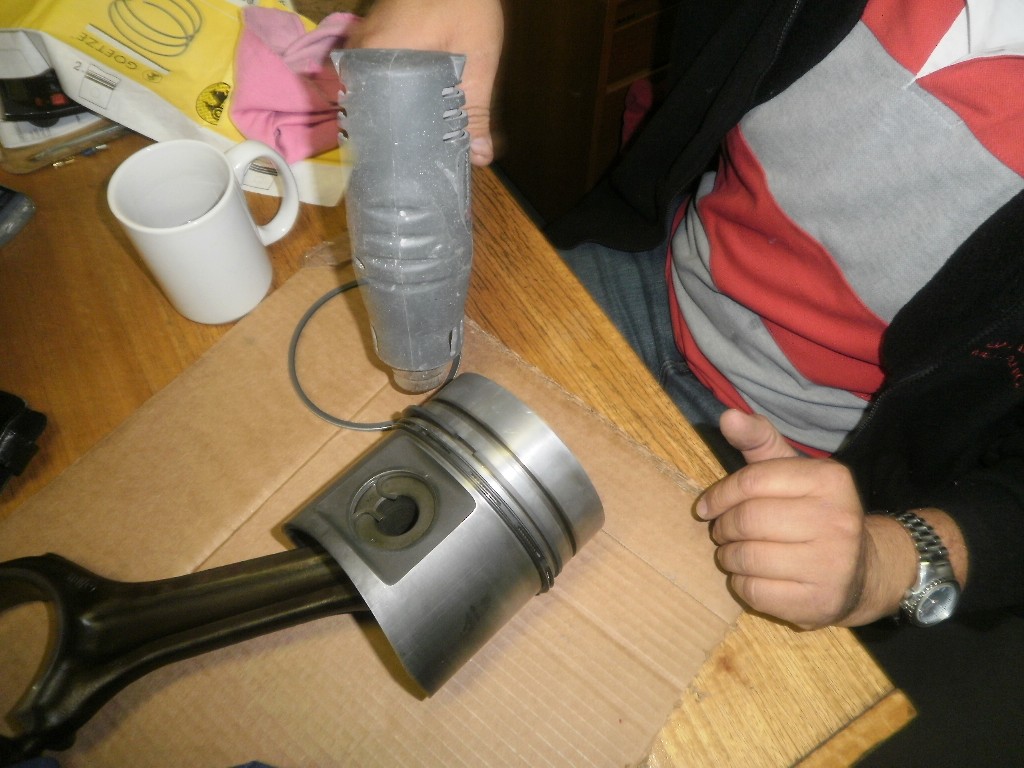
When I took off the engine I was so annoyed and tired that I abandoned/forgot the starter, holding there from its cables. With a better disposition I took it off and brang it to the shop for servicing; it would have to endure many more starts in the near future.
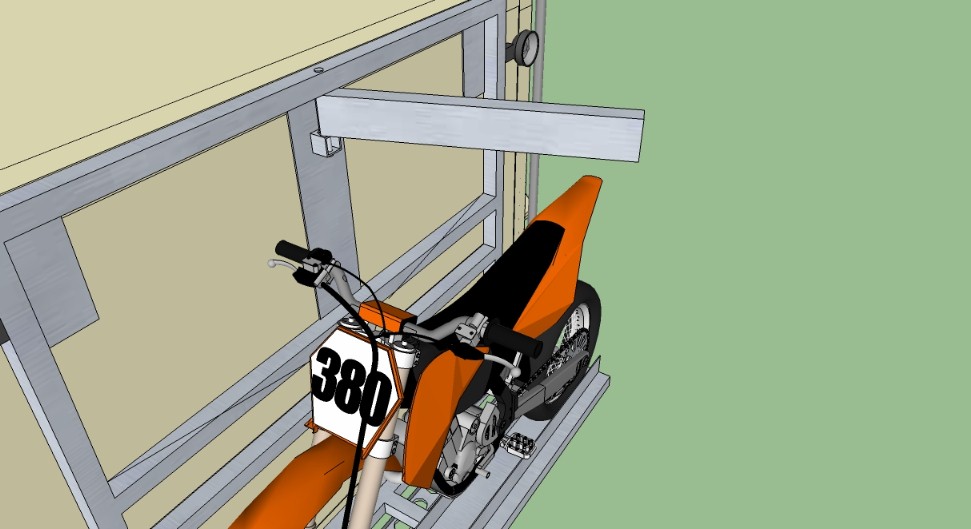
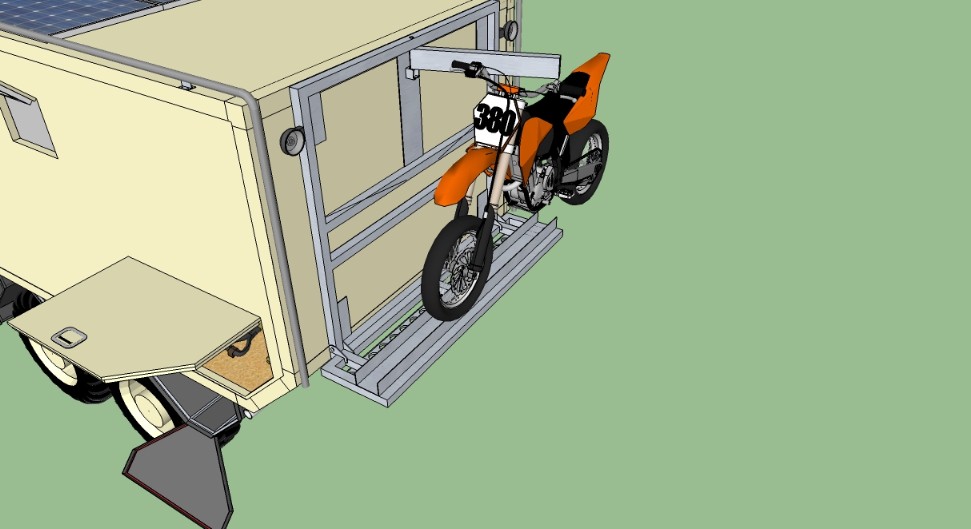
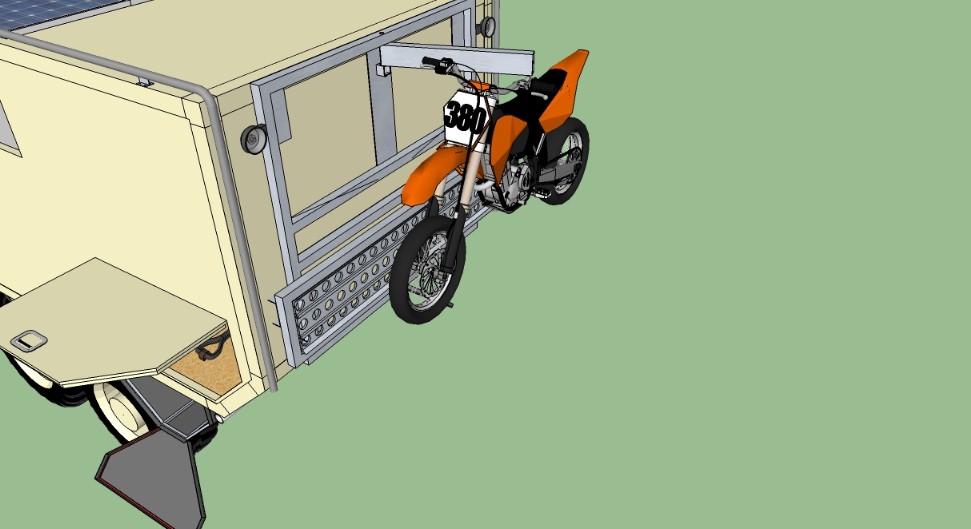
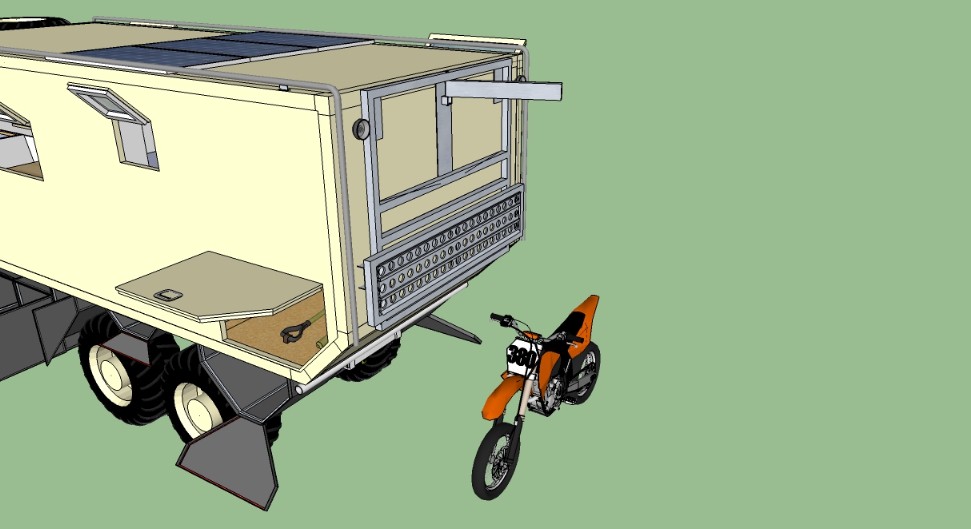
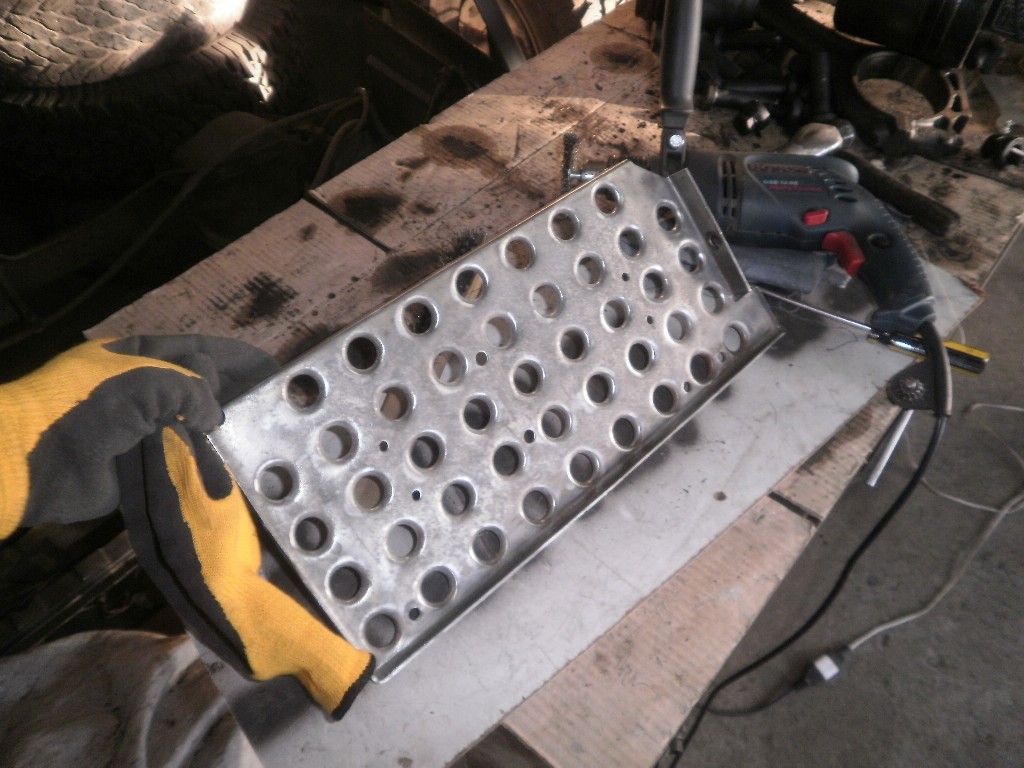
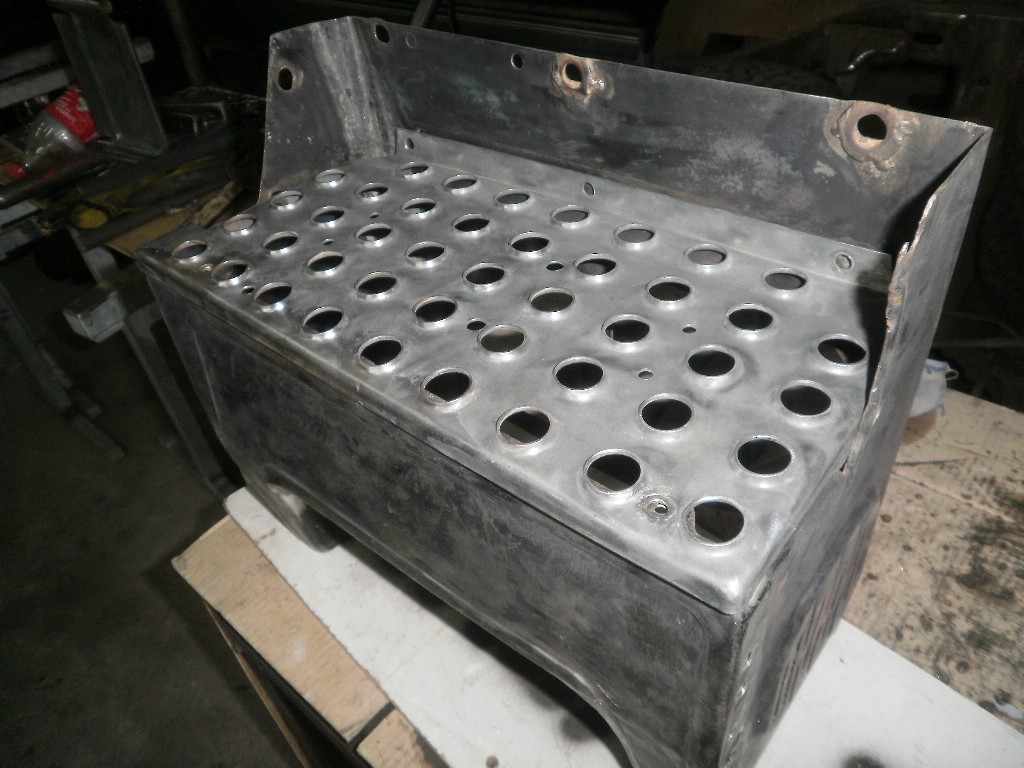
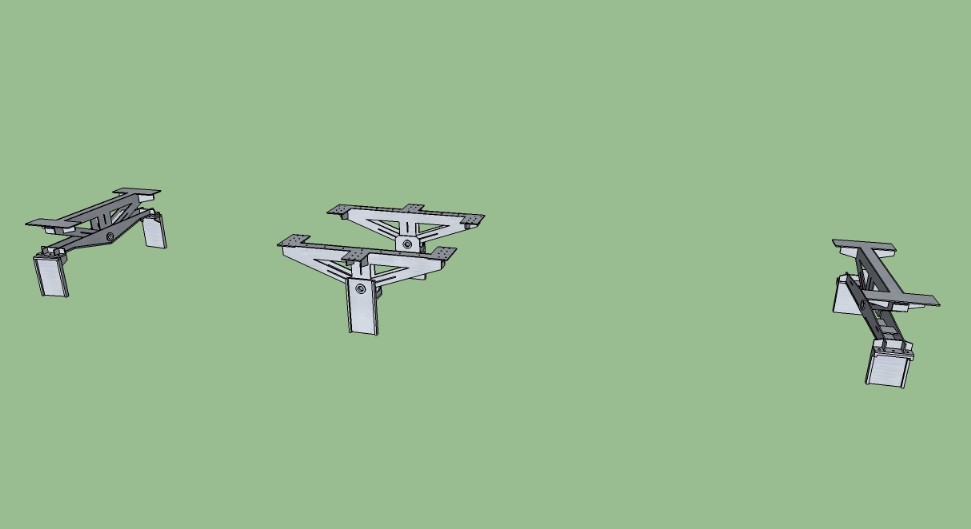
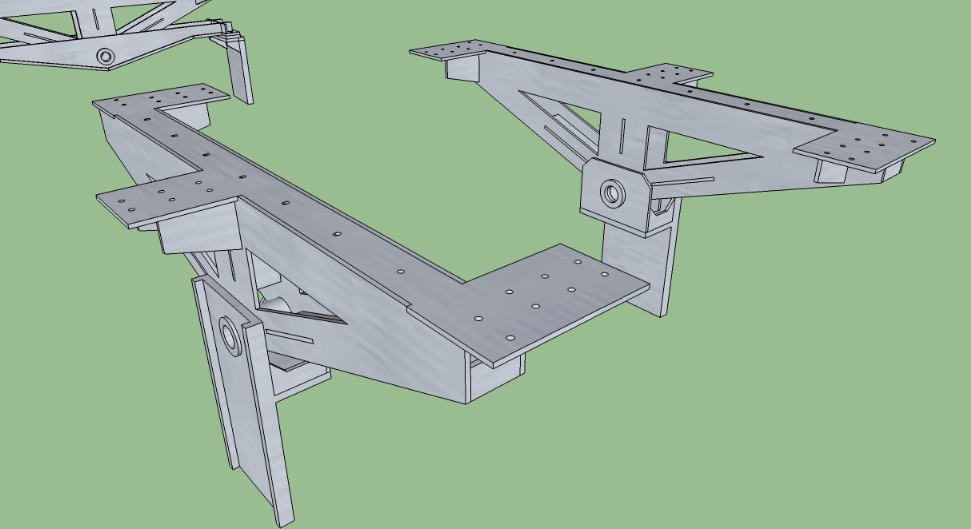
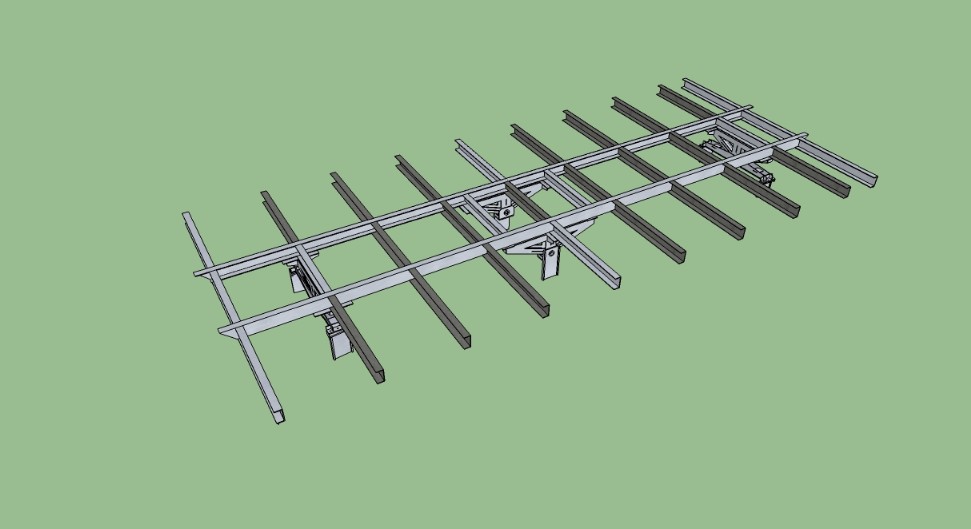
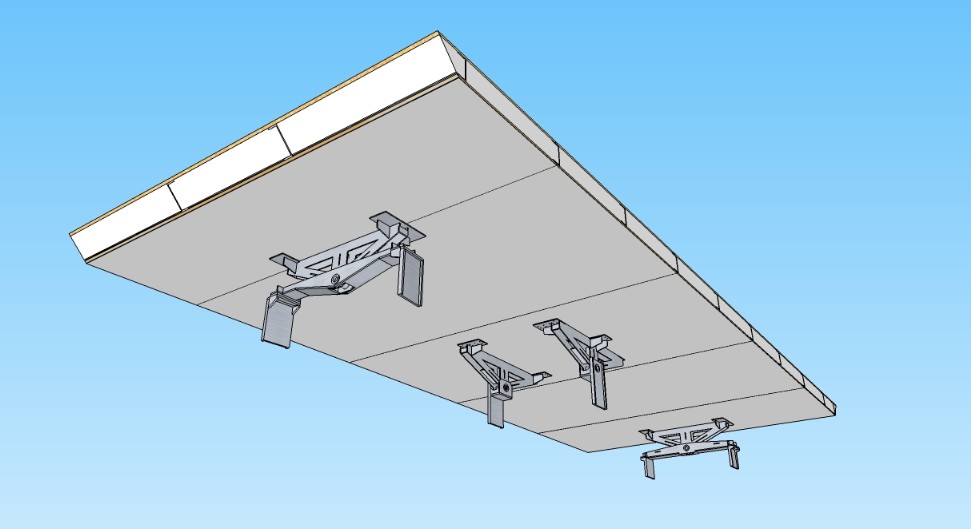
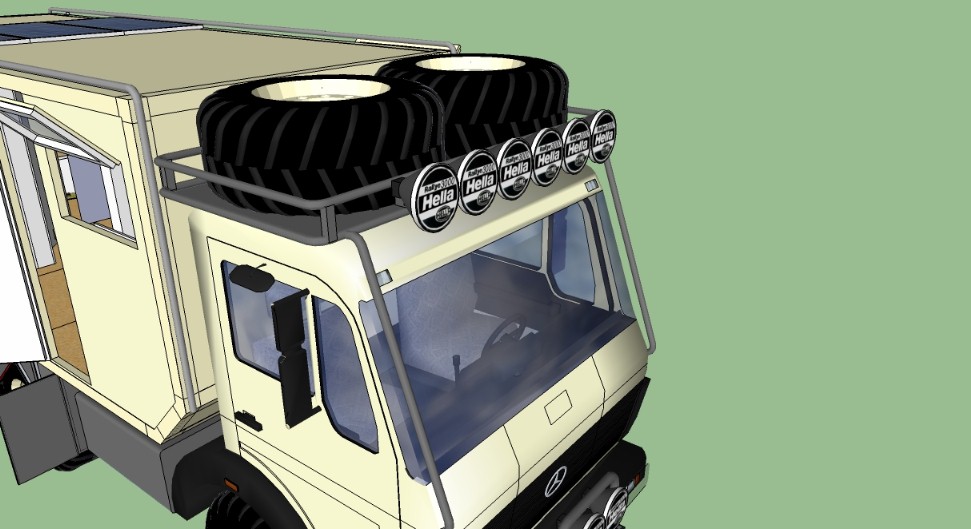
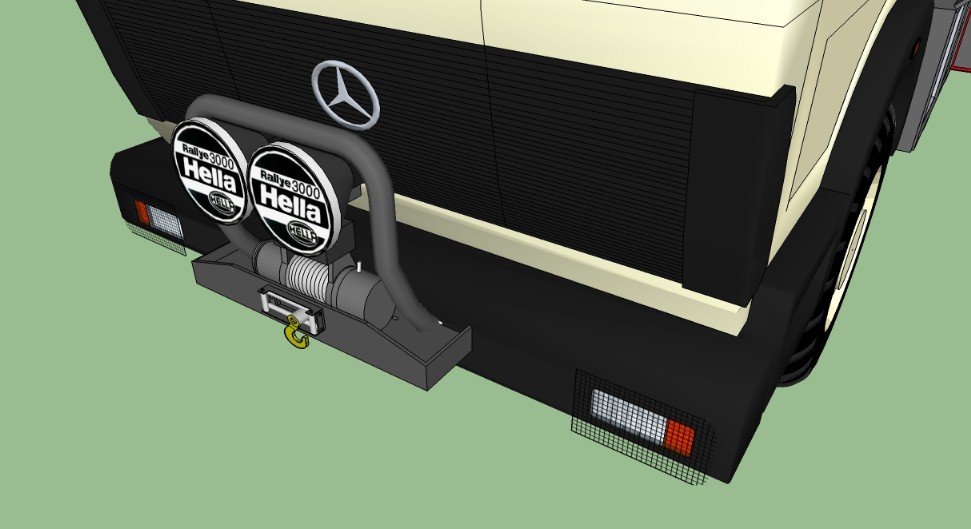
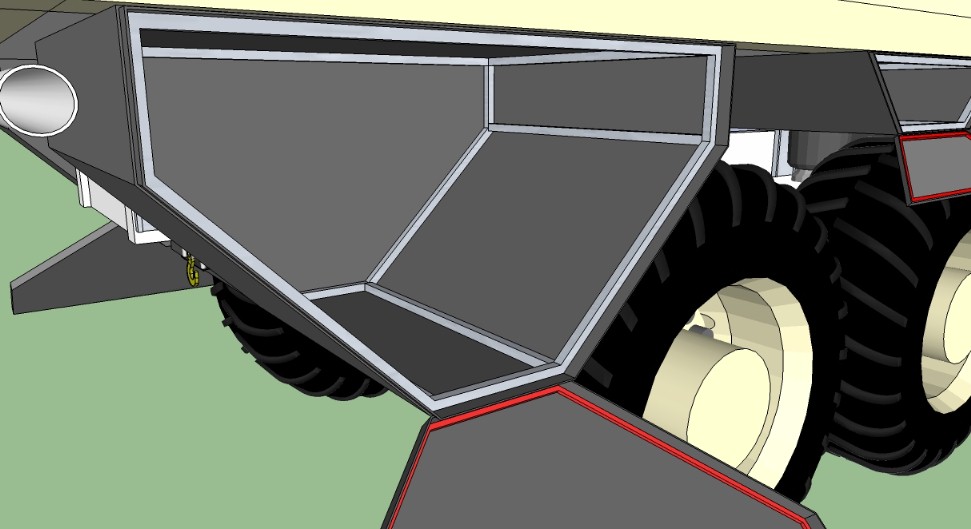
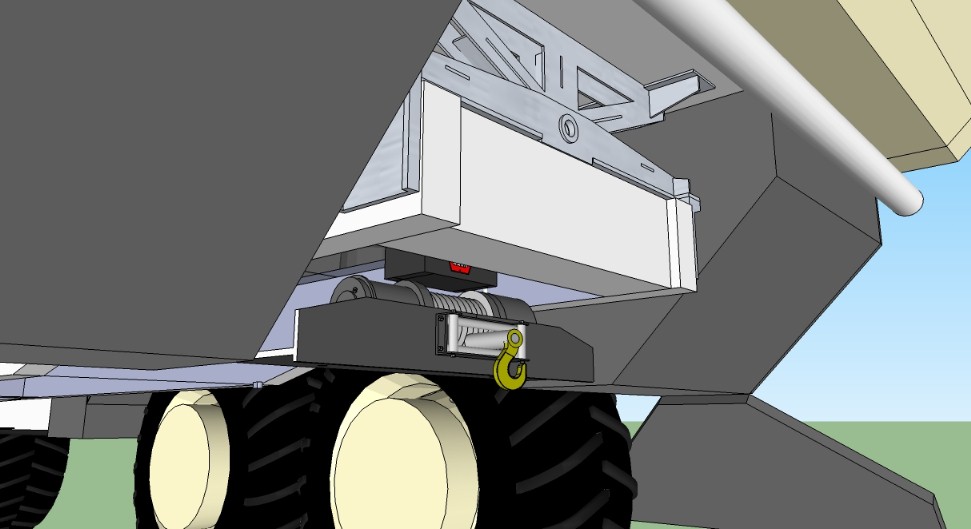
I simplified the pivoting arm to mount the motorcycle and the spare wheels on the rear rack with a single square section steel beam to allow the electric winch to be mounted directly under it. You can see how it works along with the pivoting base. I did not include neither the cable nor the winch, guess why. Underneath there will be the sand plates that, of course I yet need to acquire.
The rear lamps are the ones that I found late at night, and it seems that will remain there forever.
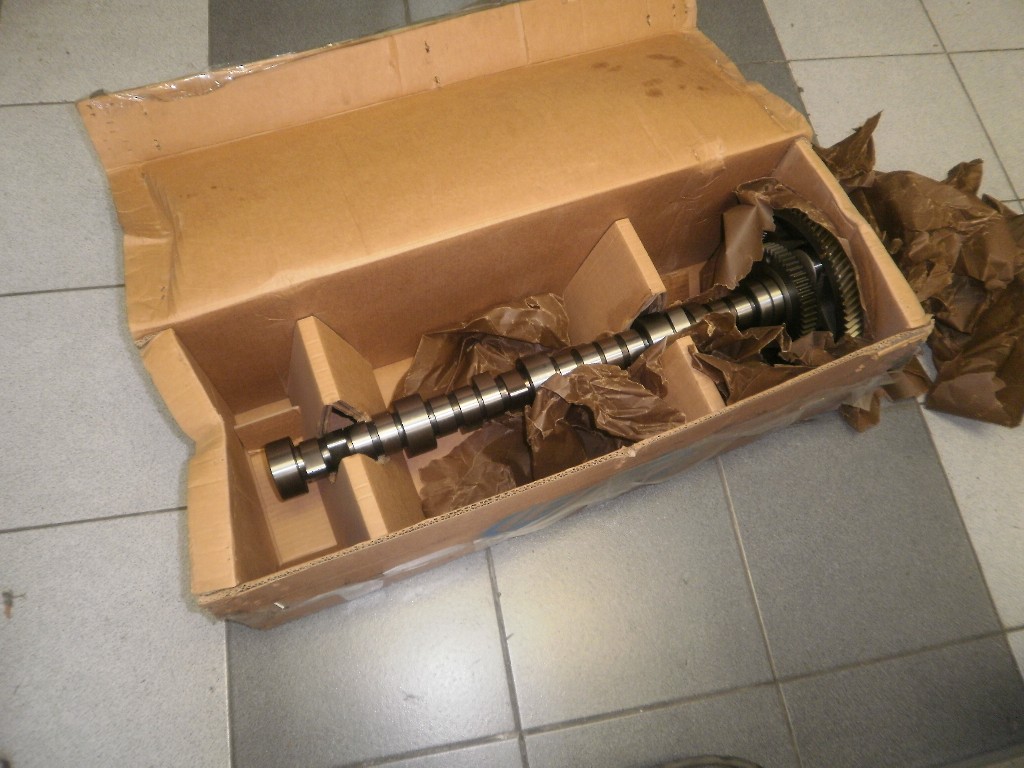
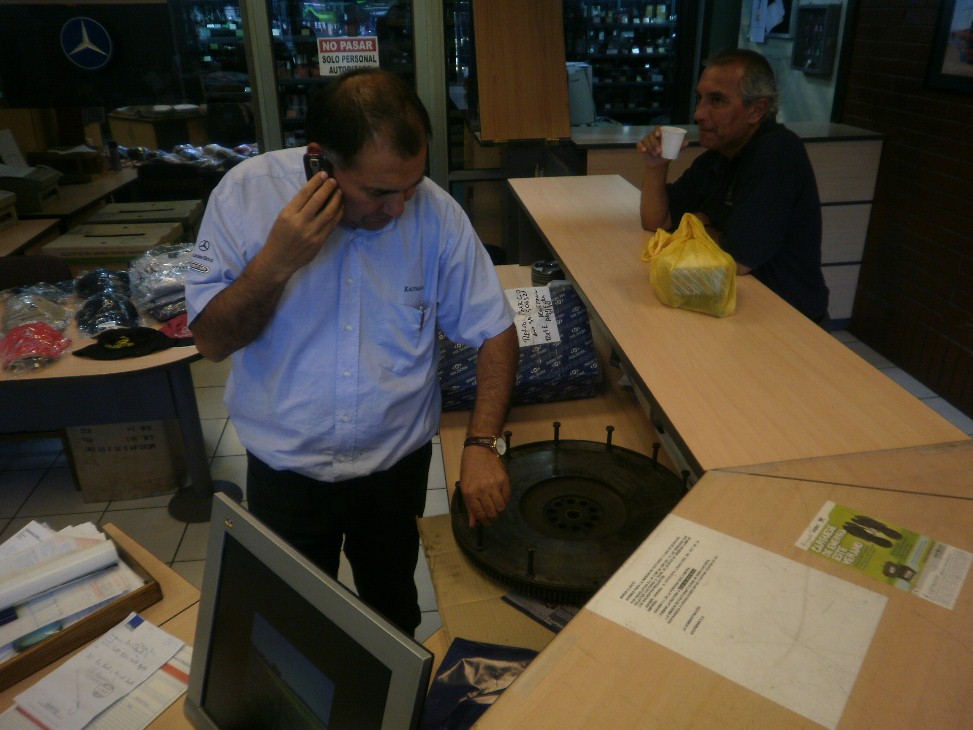
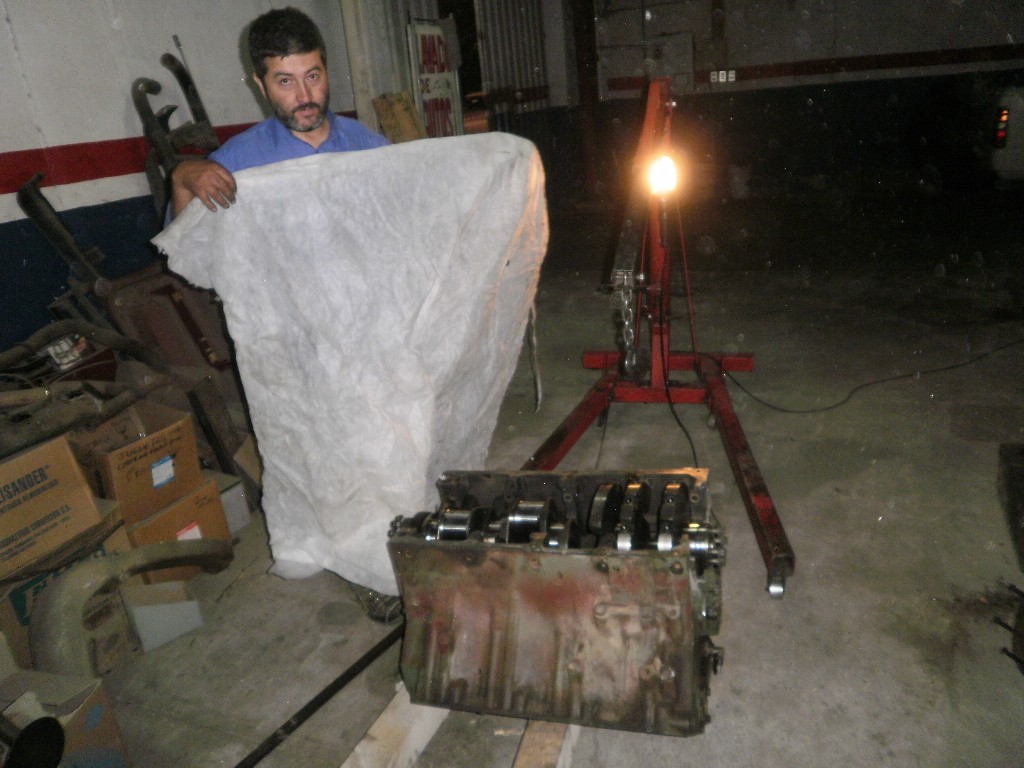
I asked Eduardo for the starter and the alternator to be taken to servicing and other things to be done during my vacations.
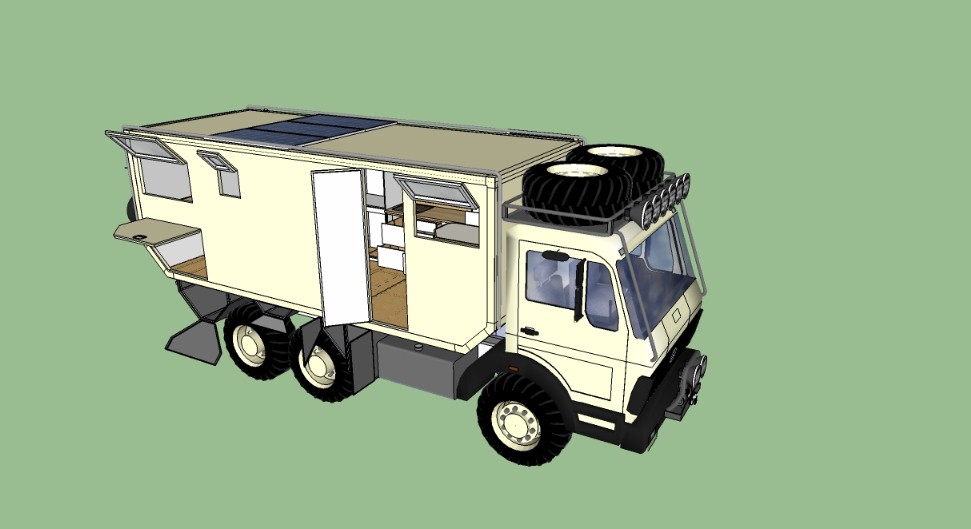
Some weeks before I had asked the good Lord for help to find the only piece of the Merkabah that certainly I would never find in a store, and without it the 6x6 wohnmobil would never be complete: the snorkel. With the snorkel the dust intake amount diminishes by 50% at least and it changes absolutely and drastically the look of the cabin and the whole vehicle, from a hardly tunned ice cream truck to a real allterrain motorhome. Well, something like it. I am full aware of my crazyness, never mind.
So, I was always alert and searching for the right truck with the snorkel I needed. As (almost) always I had a precise vision of what to expect, and I commented it to Carmen, my wife. But despite the attention and many trips around I never found it.
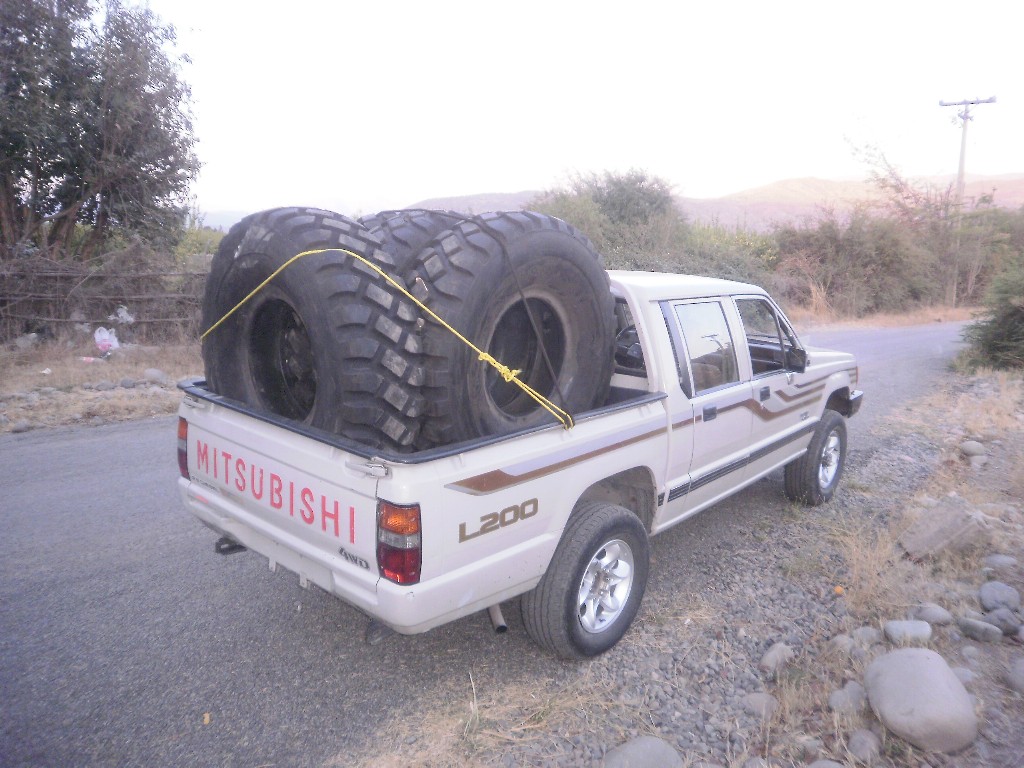
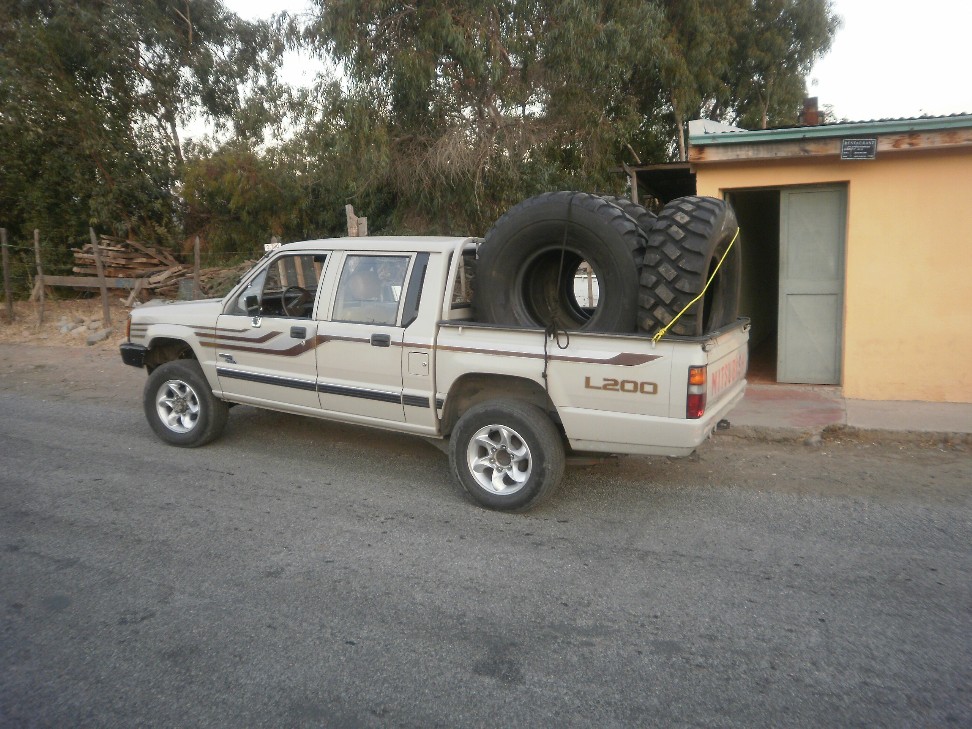
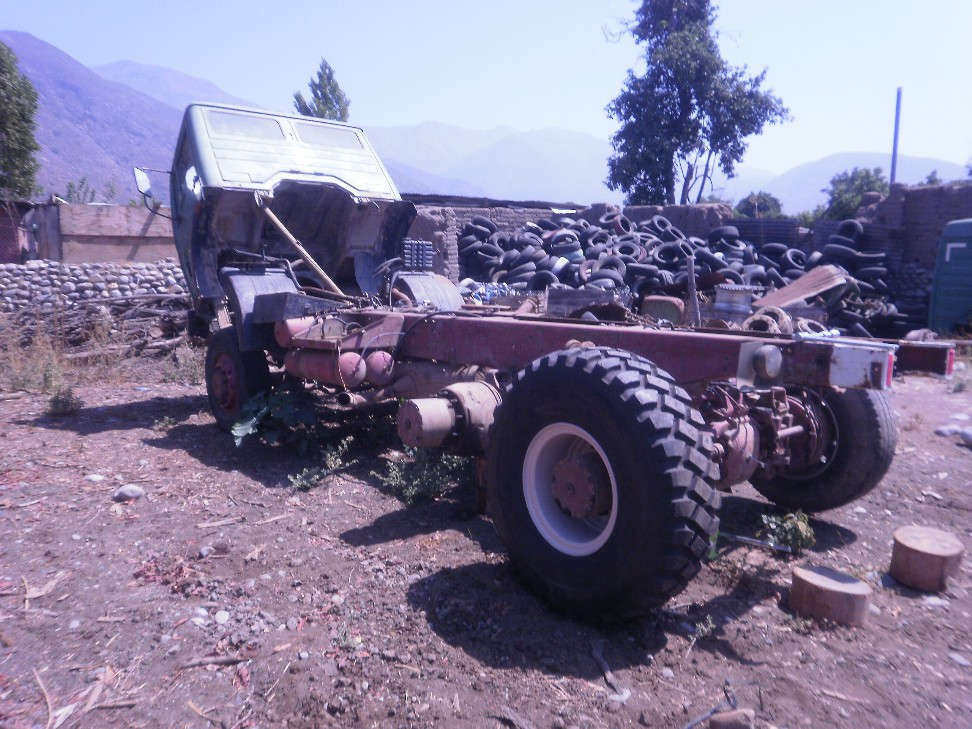
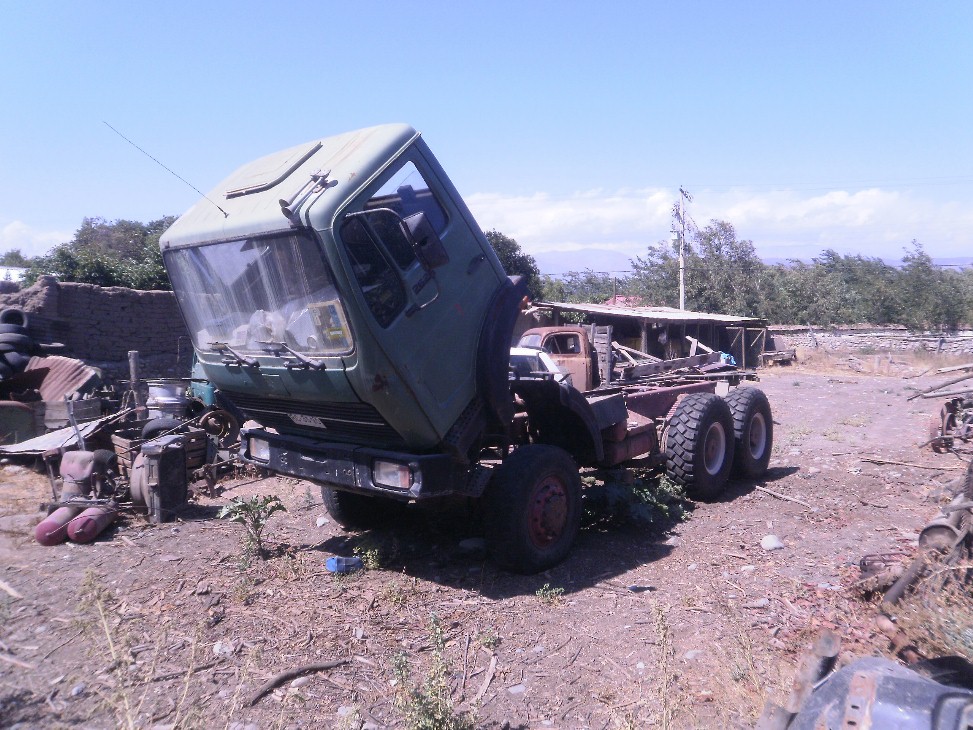
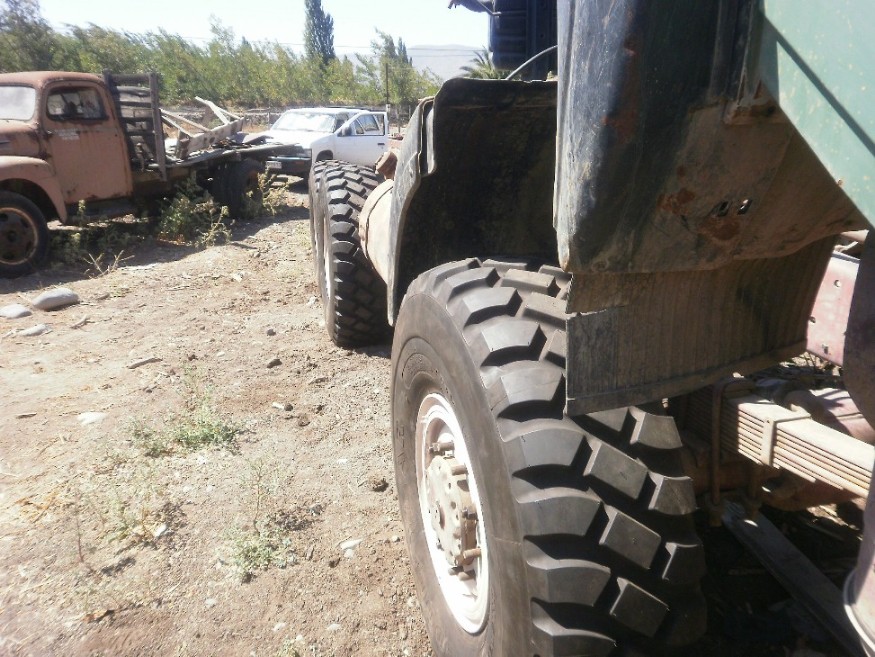
So the time came and we finally got the Terrano, prepared it along with the camping gear and went south, in worriless vacations. But the good Lord always hear what you ask Him for if you have enough faith and behave, so… guess what did I see with the corner of the eye at 120 km/hr, lost on a muddy and smokey yard, halfway between two distant cities on the big island of Chiloé, 1300 km. south from San Felipe? Yes, the wrecked orange cabin of the NG Mercedes with the snorkel waiting for me, just like the one of my vision.
To make the story short, we stopped to reach information and drove on to the next city; I located the owner late in the afternoon and bought the snorkel by phone. I woke up early the next morning and I drove the 65 km. back to the yard and disassembled the snorkel with very inappropriate tools. It took me two and a half hours because the rust was terrible and every bolt represented a battle. I put the pieces in big plastic bags and accommodate them over the luggage on the back of the Terrano. I also got permission and took the plastic water reservoir for the windshield wiper but I had to cut the mounts because I lost the battle against the corrosion of the island.
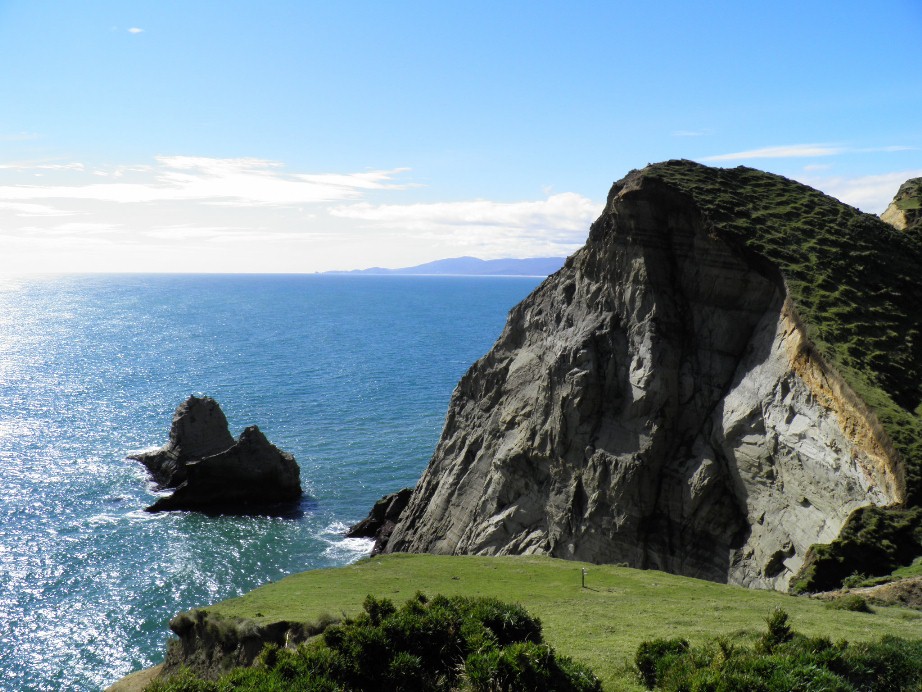
With big acknowledgments to the big Chief and to Carmen’s patience I got back to pick her up and we resumed our trip. I put a picture of one of the best views from the last occidental and austral place you can reach by car on the island, near Cucao.


Bild
Bild
Bild
Bild
Bild
Bild
Bild
Bild
Bild
Bild
Bild

Benutzeravatar
pairospam
süchtig
Beiträge: 883
Registriert: 2010-11-22 14:27:25

#82 Beitrag von pairospam » 2011-06-15 6:57:31

Well, back to San Felipe, back to work and back to the workshop where the alternator and the starter were ready, full serviced. But the last, though, had some bruises and signs of previous traumatisms and reparations that, at the moment, should be passed over. A little brushwork and some heat resistant paint and they were back to life, at least to a presentable level. I decided that the whole engine would be painted with the same heat resistant paint, and that decision immediately meant that the reassembly would take a little longer than originally thought.
Remember that I bought initially six wheels but seven wheel rims? Neither did I; so the idea was to have one spare wheel complete and one wheel without the rim to get out anywhere without concerns, and then, the deal with the Casales was for eight wheels. So I took again the Mitsubishi and went to Santiago for spareparts and to get the wheels from the Casales. At their workshop there was a brand new 4x4 Atego 918 and they were adapting to its frame a used ex-army MB 1017 torsion chassis for an expedition Box of its own. Even if I feel sometimes a little strange here I am not the only one with such ideas.
I was offered the same chassis some tie before but I was concerned by its length and by its weight. No more modifications and no more extra weight, please! Enough with what I had on my hands.
I loaded the Mitsubishi with both wheels and was about to leave when I discovered a cut on one of them. It was not as deep as to reach the inner steel layers but as it was late and there was no other wheel at hand I preferred to leave it there and come back again some other day to take a healthy wheel. I ringed Ignacio Casale and there was no problem at all, and he recommended checking the other wheels for signs of cuts. They were new but who knows what could have happened throughout the shipping and storing. They were all O.K.
Back in San Felipe the first task was to mount the wheel and its rim that occupied precious space on the workshop.

Bild
Bild
Bild
Bild
Bild
Bild
Bild
Bild
Bild
Bild

Benutzeravatar
pairospam
süchtig
Beiträge: 883
Registriert: 2010-11-22 14:27:25

#83 Beitrag von pairospam » 2011-06-15 17:41:33

The guys and I did the job in less than 3 minutes (after half an hour of waiting for my turn and 20 minutes waiting for me to get the forgotten valves from home) thanks to the experience obtained with the other six wheels. They charged me the same amount, though.
Relaxed at last for the paint was intact this time, I left the wheel for the inflation pressure to reach its running level and returned after a while to pick it aboard Fiorella, a little brazilian-made Fiat pickup mini-truck which Eduardo and everybody at the workshop is affectionate to. The huge wheel bulk made look ridiculously small the poor Fiorella and there was a rain of jokes on the subject.
I took the wheel to the cattle and I started to wonder which one of both front grilles was in better shape on its left side; the right side would be cut to allow the snorkel to be mounted. The election was far from easy as both had been bumped more than once but it seemed that the grille from Spare was better.
The PTO and almost everything on the truck looked old and overused, because it was old and overused, naturally. The hydraulic pump was a Commercial Intertech, seen on the picture with its hi-tech waterproof seals. The model was a really reputed one, at least here in Chile, and there were spareparts and servicing as needed. Good. It would be serviced and repaired for it will provide the power for the front and maybe also for the aft winch.
Just to infringe myself pain I made a couple of photos of the damage to the cabin and to the base of the gear shift lever consequence of my excess of enthusiasm when lifting the cabin with the gear shifter engaged. Hmm…
Another photo to show the cabin hinges, fixed to the frame with zero shock absorption possibility, relying only on the aft coil springs to smooth the ride a little. To adapt the front cabin suspension from Spare I would have to take the supports of the shock absorbers and put them on the cabin of the Merkabah and reinforce the aft springs as mentioned before. Nothing really difficult, just a little surgery and careful welding (theoretically, of course).


Bild
Bild
Bild
Bild
Bild
Bild
Bild
Bild
Bild

Benutzeravatar
pairospam
süchtig
Beiträge: 883
Registriert: 2010-11-22 14:27:25

#84 Beitrag von pairospam » 2011-06-15 17:52:36

About the inertial wheel: I ordered the one that the EPC identified as the correct one at the usual store but it did not match with the pressure plate. I sent it back and another one arrived a few days later, but it was also the incorrect spare, with the right EPC code. Bad thing. I grabbed both new and old inertial wheels and took them to the store where we searched along with the seller for the right spare. No way. Then I took the heavy used piece of metal and went to the nearest official Mercedes dealer office, two blocks away, and after a few courtesy coffees and 45 minutes they said that the codes had changed and that they had the right inertial wheel for my truck in stock but not at that store. Good.
I paid the price and they would look for the wheel somewhere else to send it to Sand Felipe by courier the next day. I was happy, at last, until the man at the counter said, with a big smile on his face: “Don’t you worry…tomorrow at midday it will be in San Felipe!” Bad.
The new inertial wheel arrived on time, but it was the same as the one bought the first time from the non-official dealer, and it fitted a smaller pressure plate, not the monstrous one of the Merkabah. To make things worse, the place where stood the brand and the codes was suspiciously grinded. Hmm…
In few words, another trip to Santiago with both pieces, another set of coffee cups, calls to the manager, calls from the manager, calls to the main vault, calls from the vault, a shooting session to the inertial wheel, harsh words for the EPC and two and a half hours later I finally got the right spare, with a big discount for the inconvenients (well, not as big as expected). The discount did not covered the trip expenses but I profited to make a short visit to Ignacio Casale and picked the last 14.00R20 wheel after a brief but nice conversation and the tenth cup of coffee.
Back at the shop Eduardo could not wait to see the inertial wheel to make sure that it was finally the correct one.
I work on the project as my scarce free time allows me, and at some point I picked the water pump to clean it up. I thought that it was OK and that it needed only a little lubrication and servicing. Eduardo told me kindly that it was better and safer to replace it; unfortunately he said it after dismantling and cleaning it partially, what took me some precious time. Life is still hard.
As I like a lot the design of the Merkabah I put the sketches of the interior of the Box showing more detailed views of the furniture of the living-dining-studio-sleeping room. All the surfaces will tilt and bellow the storage compartments under the sits there will be the fresh water tanks.


Bild
Bild
Bild
Bild
Bild
Bild
Bild
Bild
Bild
Bild
Bild

Benutzeravatar
pairospam
süchtig
Beiträge: 883
Registriert: 2010-11-22 14:27:25

#85 Beitrag von pairospam » 2011-06-15 18:03:30

At a given moment I went to the cattle and took off the gear shift lever, the only piece remaining bolted to the cabin of Spare, and got the base that will replace the one ruined of the Merkabah. The lever itself is different but the bases are the same. I realized that the leak from the cube of the third axle was worse than before but it would have to wait until we could take the truck to the shop to disassemble the whole axle for servicing.
Finally, on April 4th, I freed a little space at the shop and picked the block to begin the reassembly session. The plastic film covered it since the new camshaft bearings were adjusted, and when the film was removed the rust showed up pitiless on the sleeves. “Never fear!”- Eduardo shouted - “A little #400 sand paper, kerosene and gasoline mixture and the thing can be easily fixed!”. And there left Pairoa for the store and the gas station to get what was told to get, and there he removed carefully and with a lot of effort the new camshaft, and there he began to sand vigorously but carefully the sleeves under the inquisitive eye of the mechanic chief.
Sanding the sleeves is a not killing task, but it needs to be done with a precise technique and as everything in this project it takes time, a lot of time.
When the sleeves were sanded and ready I put the block upside down to put the stuff in. Some rust had formed after the chemical bath but a little toilette and it was gone.


Bild
Bild
Bild
Bild
Bild
Bild
Bild
Bild
Bild

Benutzeravatar
pairospam
süchtig
Beiträge: 883
Registriert: 2010-11-22 14:27:25

#86 Beitrag von pairospam » 2011-06-15 18:17:05

There is something terribly exciting when you start to assemble any complex puzzle of steel, especially when all the spares and pieces are in their boxes and you can align them in order, pick them up, unwrap them one by one and put them at their place. The excitement ends though when you find that every single cam follower has a sticker fiercely stuck to it, and that the sticker only will go out with the aid of some gasoline-kerosene mixture. A pain in the ass.
With the stickers issue resolved I proceeded to install the cam followers on the block, the actual first concrete action of reassembling the engine of the Merkabah. What a feeling!
I put back in place the camshaft with the aid of Eduardo. The new shaft, with its pointed and sharp cams, fitted and turned perfectly as expected.
I photographed every spare box, in case some day the motor explodes and there will be a search for the guilty component (not the guilty mechanician, of course!)
At every step Eduardo taught me to be patient and to pay a lot of attention when putting on every piece like the flat bearings of the crankshaft. He put the first one but I put the rest of them, excited like a little boy with his brand new toy.
I washed the crankshaft carefully but there was some paint dust adhered to it, despite the efforts to cover everything when painting. There went Pairoa again with its #600 sand paper and the old pantyhose sanding method until every crankpin shone in the 150 watt lamp light.
It was late but I wanted to mount the crankshaft at all costs that afternoon. After a couple of failed attempts we decided that it was too risky and of doubtful success to do it by hand, so we hung the crankshaft from the winch to do the job while Carmen laughed at my growing exasperation and tiredness. Women have this powerful weapon: they laugh while you are in distress, you then get misplaced and put out of balance, and finally you end laughing as well.

Bild
Bild
Bild
Bild
Bild
Bild
Bild
Bild
Bild
Bild

vikingswen
Schrauber
Beiträge: 325
Registriert: 2009-07-29 20:31:33
Wohnort: Im Peterbilt
Kontaktdaten:

#87 Beitrag von vikingswen » 2011-06-15 19:32:49

Hi Pairoa,
I hope that is your name. I read the whole thread with great interest and I am quite impressed with your undertaking. Sometimes I do wonder about the order you preceed, but since I only know very litlle of your circumstances please don't take my observations the wrong way.
As a mechanic I cringe reading about 400 grid sand paper to address the cylinder sleeves. Do you have acess to a flex hone?
flex hone
You should use one of those to get a nice cross hatch pattern on the surface of your cylinder liners. Also have you cleaned all the the oil passages and threads in the block after the chemical dip? There is a lot of stuff left in those passages and if not removed carefully you can have engine damage at start up or premature engine failures due to the contaminants. Make sure you cover the partially assembled engine well to keep dirt, dust and moisture out.
Good luck with your project.
Swen who lives in the America to the North of you.

Benutzeravatar
pairospam
süchtig
Beiträge: 883
Registriert: 2010-11-22 14:27:25

#88 Beitrag von pairospam » 2011-06-17 0:52:23

Hi Swen:
Yes, Pairoa is my first name. Any comment, advice, recommendation, or oh, my God! are very appreciated.
Actually, the sand paper used was #240 and not #400, and these were the instructions from the ones who know.
I cleaned up the block as complete as I could and covered it all the time, but I still wonder if it was enough.
Cheers from the one who lives the south of you.

Pairoa

Benutzeravatar
pairospam
süchtig
Beiträge: 883
Registriert: 2010-11-22 14:27:25

#89 Beitrag von pairospam » 2011-06-22 6:42:28

Hi again:

I respect and trust my brother-in-law blindly in every mechanics issue, but I was intrigued by the observation from Swen about the sleeve polishing matter, so I asked secretly other mechanicians with experience on big diesel engines and none of them used flex hones unless they were applied by programmable polishing machines. If the job had to be done by hand, they privileged the sand paper and the old fashioned technique, by far.

Anyway, after putting on the crankshaft Eduardo solemnly ended that long working journey covering up the block after the last photo, until the next time to proceed with the assembling.
Two days after I found time to continue to work on the engine. Spare’s cut diesel tank plate became an excellent tray to wash the pieces, following faithfully the recycling spirit of the project.
I repeat once more that I am not a mechanician, far from that, and that this is my first engine overhauling, but the feeling of having every spare part wrapped and ordered in its box is very nice and better than having a Christmas tree full of gifts. Though, assembling every part is not a joke and every piece has its left and right side, an upper and an lower face, a little asymmetric hole or a mark on one of its surfaces, and if you do something wrong and lubrication or anything does not work properly the whole Merkabah may go to sh..t and the dream is gone soon after turning the starter key. So, I had (have) to be very careful and think twice at every move, and it was (is) fundamental to have my brother in law Eduardo by my side to assist me and to kick my butt every now and then.
Without too much effort the lower main bearing caps along with the bearing shells were at their place and I finally could use my new torque wrench. Oh, extraordinary feeling when making the crankshaft turn so smoothly!
The momentary ecstasies lasted only a little moment because the turn arrived for the pistons to get prepared. They were all in a very horrendous state according to me; they had a heavy crust of old and hardened oil and who knows what else.

Bild
Bild
Bild
Bild
Bild
Bild
Bild
Bild
Bild

Benutzeravatar
pairospam
süchtig
Beiträge: 883
Registriert: 2010-11-22 14:27:25

#90 Beitrag von pairospam » 2011-06-22 6:59:57

Eduardo told me that the only things the pistons needed were some love, dedication and careful grinding. I resigned to the idea and began to work on them with tons of patience. It was very hard to clean the pistons and leave them without any trace of carbon and making no damage to the fragile aluminum, but when finishing the job it was very satisfying to see them shining, clean and fresh. Well, almost.
After cleaning the first two pistons my hands were a mess, but Alejandro took me a couple of enormous and colorful gasoline and oil resistant gloves to continue with the job. Too late; the dirt under the nails lasted one week.
At the end, many hours after, the pistons were clean and ready and I put them back in their boxes following the original order. The next step would be putting the rings on and install them in the block. At the next working session the only thing I wanted was to put the pistons on, but I had to clean the sleeves that I had to polish before and left covered to avoid new corrosion to form. Some more patience, the kerosene and gasoline mixture and clean clothes and the sleeves shone again, taking care not to take dirt or fluids to the crankshaft bellow.
The pistons were kept in their original position thanks to the order maintained through the process and thanks to the photographic records; all the previous markings disappeared with the cleaning.
Putting the rings is not an easy task, especially if you do not have a ring forceps (do not know its actual name) of this size at the workshop. After the expected picture and the precise amount of heat Eduardo and I put carefully the rings, with no damage to the lateral surface of the pistons; I feared a lot damaging the pistons! The three rings have a precise location, respect to the piston and respect to each other, and not random as I thought initially. I beg the pardon of the ones who did know. Just another little but important thing to bear in mind when reassembling an engine.


Bild
Bild
Bild
Bild
Bild
Bild
Bild
Bild
Bild
Bild

Antworten